Setting up Online Programs
Online Programs: Creating a New Program
Create an online program to inspire, teach, and engage your audience with your business. Use our templates for courses, fitness challenges, nutrition plans, or personal coaching, or build your own program from scratch. Once your program is set up, fill it with content and start inviting people to join.
Before you begin:
Add Online Programs to your site. Some Wix templates already include Online Programs, making it easier for you to get started.
Upgrade your site to allow people to join your program.
Step 1 | Choose a program template
After adding Online Programs to your site, you can now create a program. Choose an existing template to customize or start fresh and build your own program.
Dashboard
Wix app
Go to Online Programs in your site's dashboard.
Click + Create New.
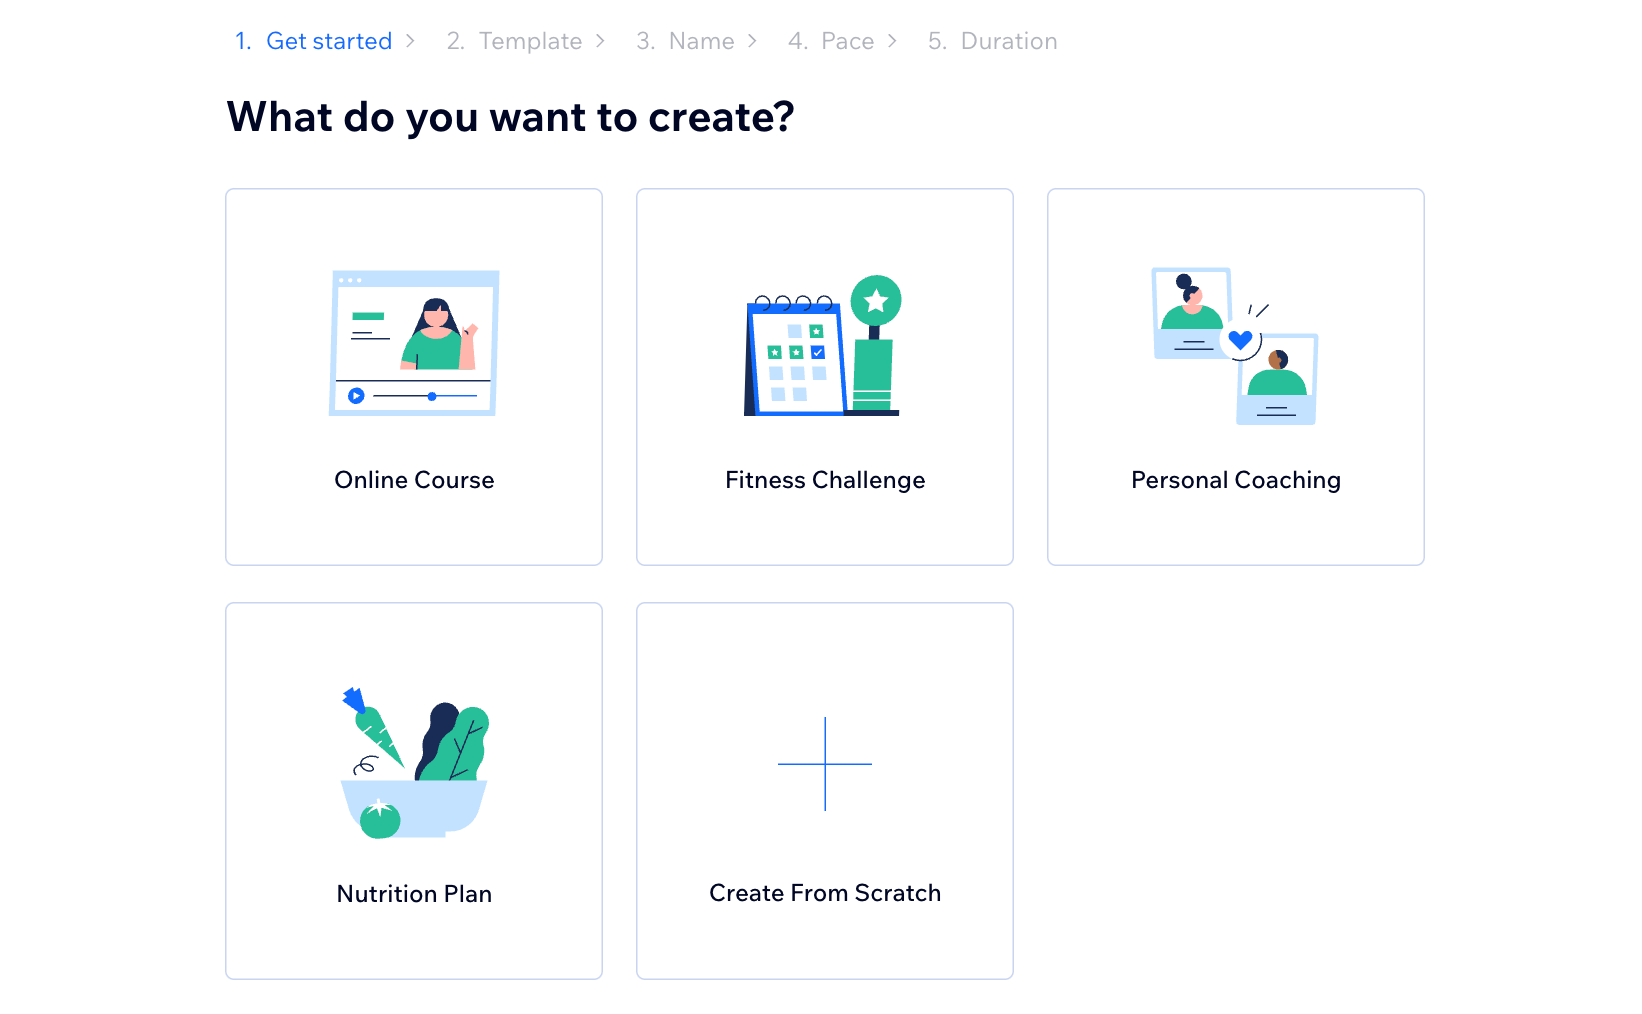
Click the type of program you want to create:
Template: Choose a program template from the list (e.g. Online Course).Click Next.
Select one of the templates and click Finish.
Start Fresh: If none of the templates suit your needs, you can create a program from scratch.Click Next.
Enter a name and click Next.
Set the pace and click Next.
Set the duration and click Let's Go.

What's next?
A specific page for the new program is created in the Draft tab of the Online Programs section of your dashboard. From there, you can edit its content and settings.
Step 2 | Enter your program details
Your new program is saved as a draft and ready for you to customize. Introduce the program to your members, set the pricing, and choose between a self-paced structure or a scheduled one. You can also connect groups and assign badges or certificates to participants.
Dashboard
Wix app
Click Edit next to Program settings.
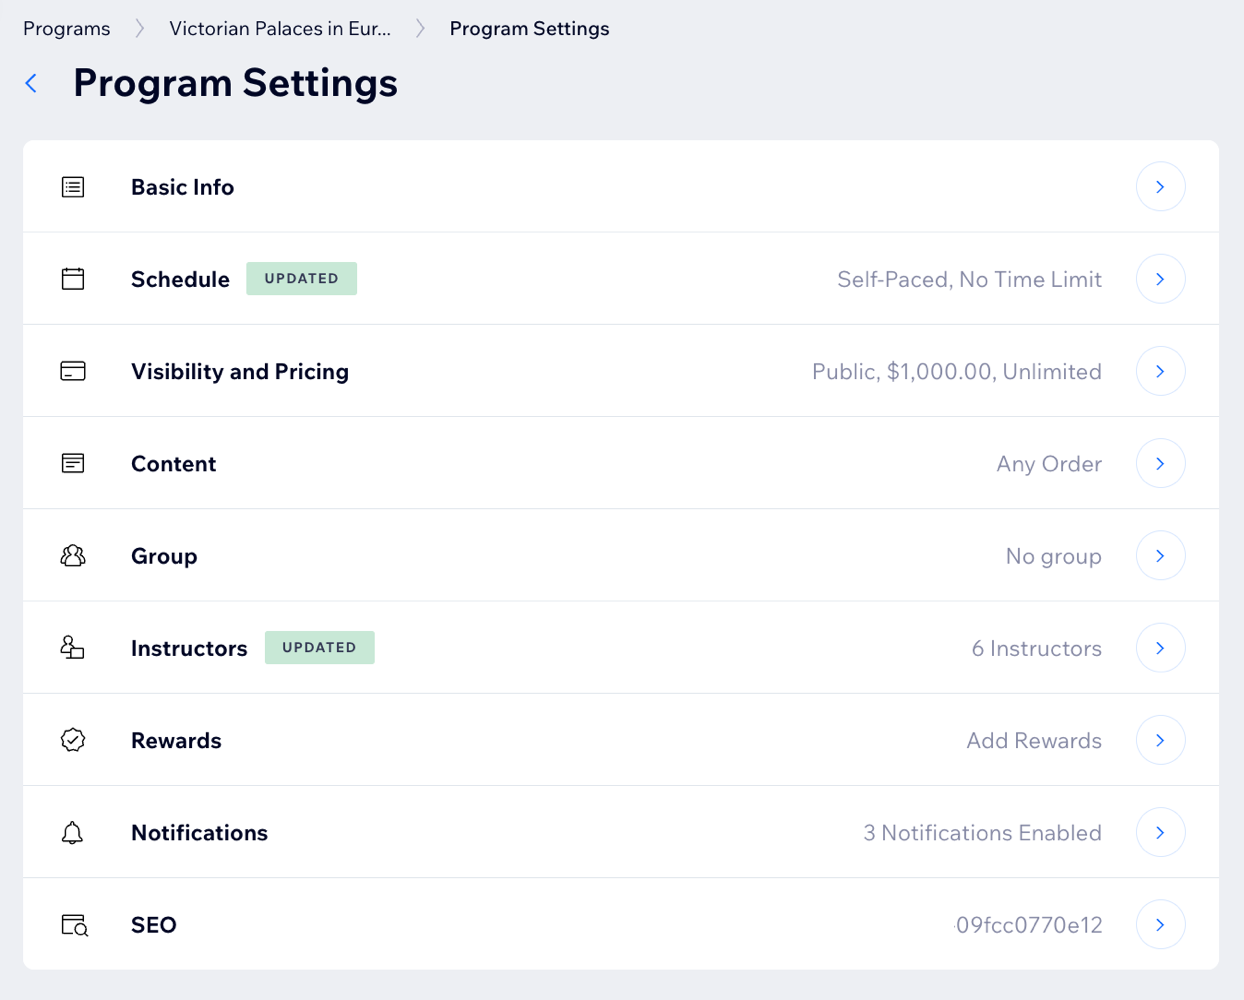
Edit any of these details:
Basic Info
Click Basic Info.
Add the following program info:Program Name: Enter a new name or edit the existing one.
Category: Add category labels to appear in your program list.
Cover image: Customize your cover image.
Description: Write what your program is all about.
Instructors: Add instructors and assign them to your program.
Click Save.
Visibility and Pricing
Click Visibility and Pricing.
Customize the following program info:Visibility: Decide who can view and join the program.
Pricing: Decide whether people pay to join a program.
Tip: Automatically send an invoice when someone purchases your program.
Number of Participants: Set how many people can join a program.
Click Save.
Schedule
Click Schedule.
Set your program to be self-paced or have a predefined schedule:Self-Paced: Participants can complete steps whenever they like. Set the Timing.
Scheduled: Participants are expected to complete specific steps on specific days. Choose the Program Duration for when the program starts and ends.
Click Save.
Tip: Create an automation to control participant access once the program is done.
Content
Click Content.
Choose the order in which participants view and complete the steps:For a scheduled program: Enable the Hide future steps toggle to hide the content of future steps until a current step is completed.
For a self-paced program: Choose the step order for your participants to follow:Any Order: Participants can complete steps in the order they want.
Fixed Order: Participants can complete steps in the order you set for them.
Enable the Hide future steps toggle to hide the content of future steps until a current step is completed.
Enable the relevant toggles to customize your video step experience:Require to watch videos: Set a required percentage participants must watch to complete the step.
Autoplay next video step: Automatically play the next video after the current one ends.
Note: These settings apply to all video steps in your program.
Click Save.
Group
Create a group for your participants to help them connect and share information easily. This group will provide a space for collaboration, where they can create polls, post updates, comment, and interact with each other.
If you set up the group after participants have already joined your program, you'll need to add existing members manually or allow them to join on their own. To make it easier for new members, you can set up an automation that adds them to the group when they join your site.
Click Group.
Click Connect Group.
Choose what you want to do next:Connect an existing group: Select the relevant group.
Create a new group: Click Create Group at the bottom.
(Optional) Manage your group:Edit group settings.
Add group members.
Post in your group.
Rewards
Reward your participants to encourage and motivate them. You can create a certificate for completing your program and assign badges after completing certain steps.
Click Rewards.
Choose what reward you want to add to your program:
Certificate:Click Create Certificate.
Create your certificate.
Badges:Click +Add badge.
Select the checkbox(s) next the relevant badge or click +New Badge to create a new one.
Click Save.
Select the relevant checkbox to decide when participants earn a badge:Complete all steps.
Complete at least one step.
Everyone gets a badge.
Click Save.
Notifications
Click Notifications.
Enable the relevant toggles to choose how and when to notify your participants:Invitation: This is always enabled to notify site members when they’ve been invited to join this program.
Steps For Today: Notify participants on days they have steps to complete.
Program Has Ended: Let participants know that the program has ended.
All Steps Complete: Congratulate participants when they complete all steps in the program.
(Optional) Click Go To Automations under Want to explore more notifications? to create custom automated emails for your program.
Click Save.
SEO
Click SEO.
Click the relevant tab to customize the SEO settings:Basics: View how your program shows up on search engines, update title tags, meta descriptions, or your URL.
Advanced: Mark up elements on your program so that search engines can understand the data, index the content for bots to interpret, and help search engines get important info about your program.
Social share: Customize how search engines & social networks show the preview of your program.
Click Save.

Step 3 | Add sections and steps to your program
Build your program content by adding steps that guide participants toward their goals. Include multimedia elements and interactive activities to keep participants engaged, and group steps into sections for better organization.
Important:
Sections are only available for self-paced programs.
Dashboard
Wix app
Go to Online Programs in your site's dashboard.
Click the relevant program.
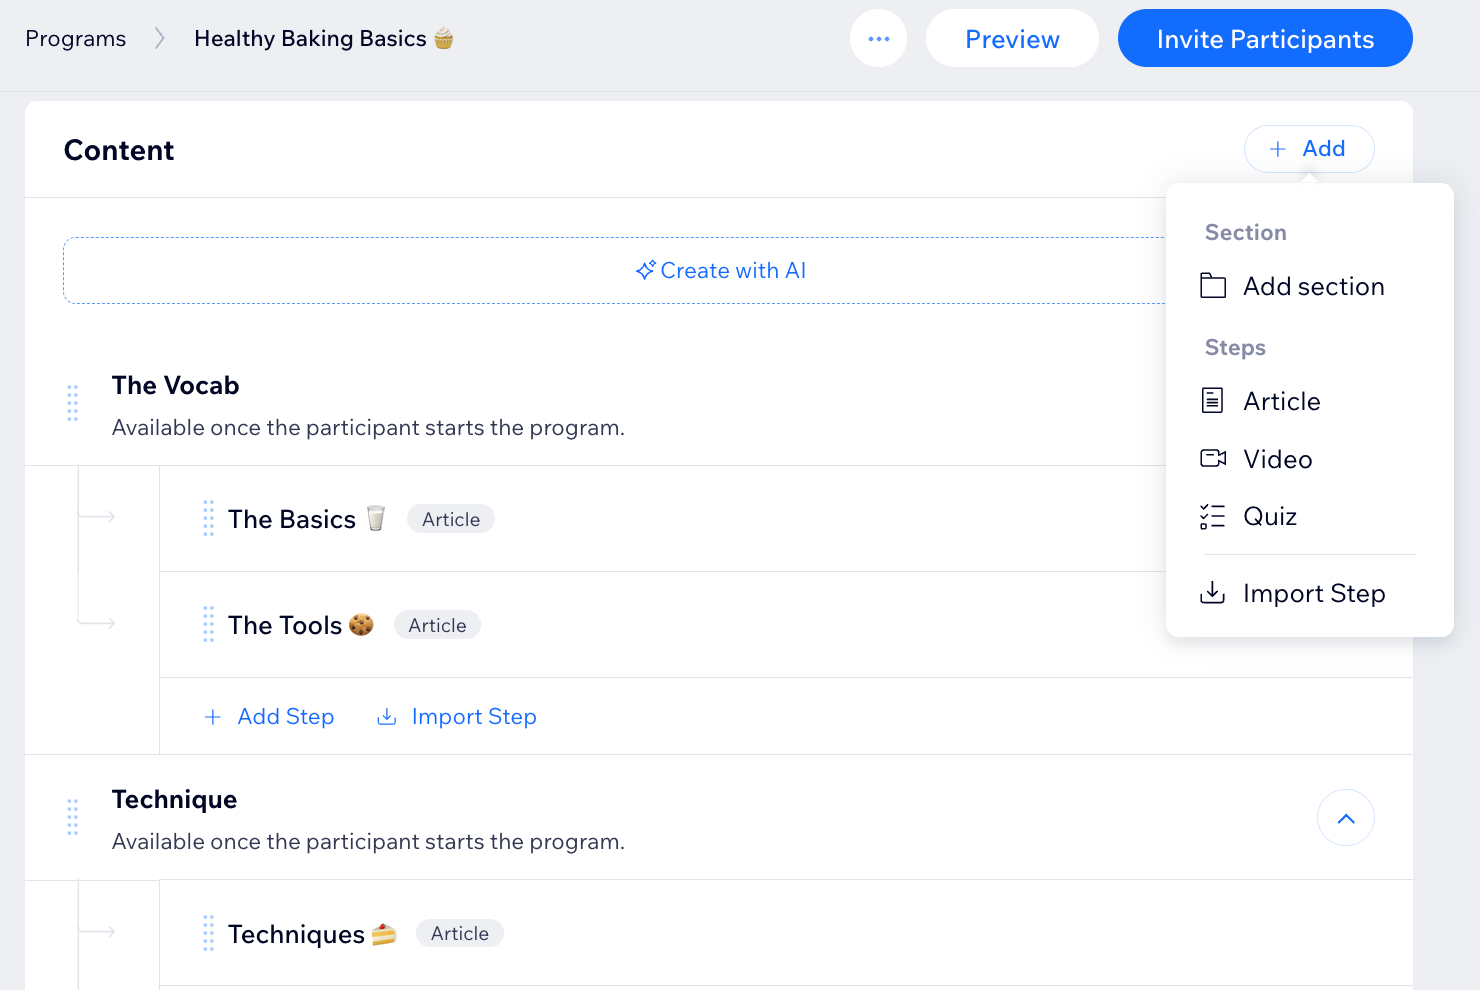
Click + Add next to Content or Schedule.
Select the relevant content type:Add section: Add a new section to your program.
Article: Add an article to a section, include images, videos, buttons, files, and tables. If you're using Wix apps like Stores, Bookings, or Events, you can embed products, services, and events.
Video: Add a video-based step to a section.
Quiz: Add a quiz to keep participants engaged while completing this step.
Import Step: Add a step from one of your existing programs for quick editing.
Customize the step you created.
Click Save.
Repeat steps 3-6 to add more steps to your program.

Step 4 | Publish your program and invite participants
After setting up your program, you’re ready to make it go live. Publish it and invite participants to join.
Note:
When you invite someone to join your program they are not automatically added. Participants cannot preview the steps and content of your program before they join.
Dashboard
Wix app
Go to Online Programs in your site's dashboard.
Click the relevant program.
Click Publish at the top right.
Click Publish to confirm.
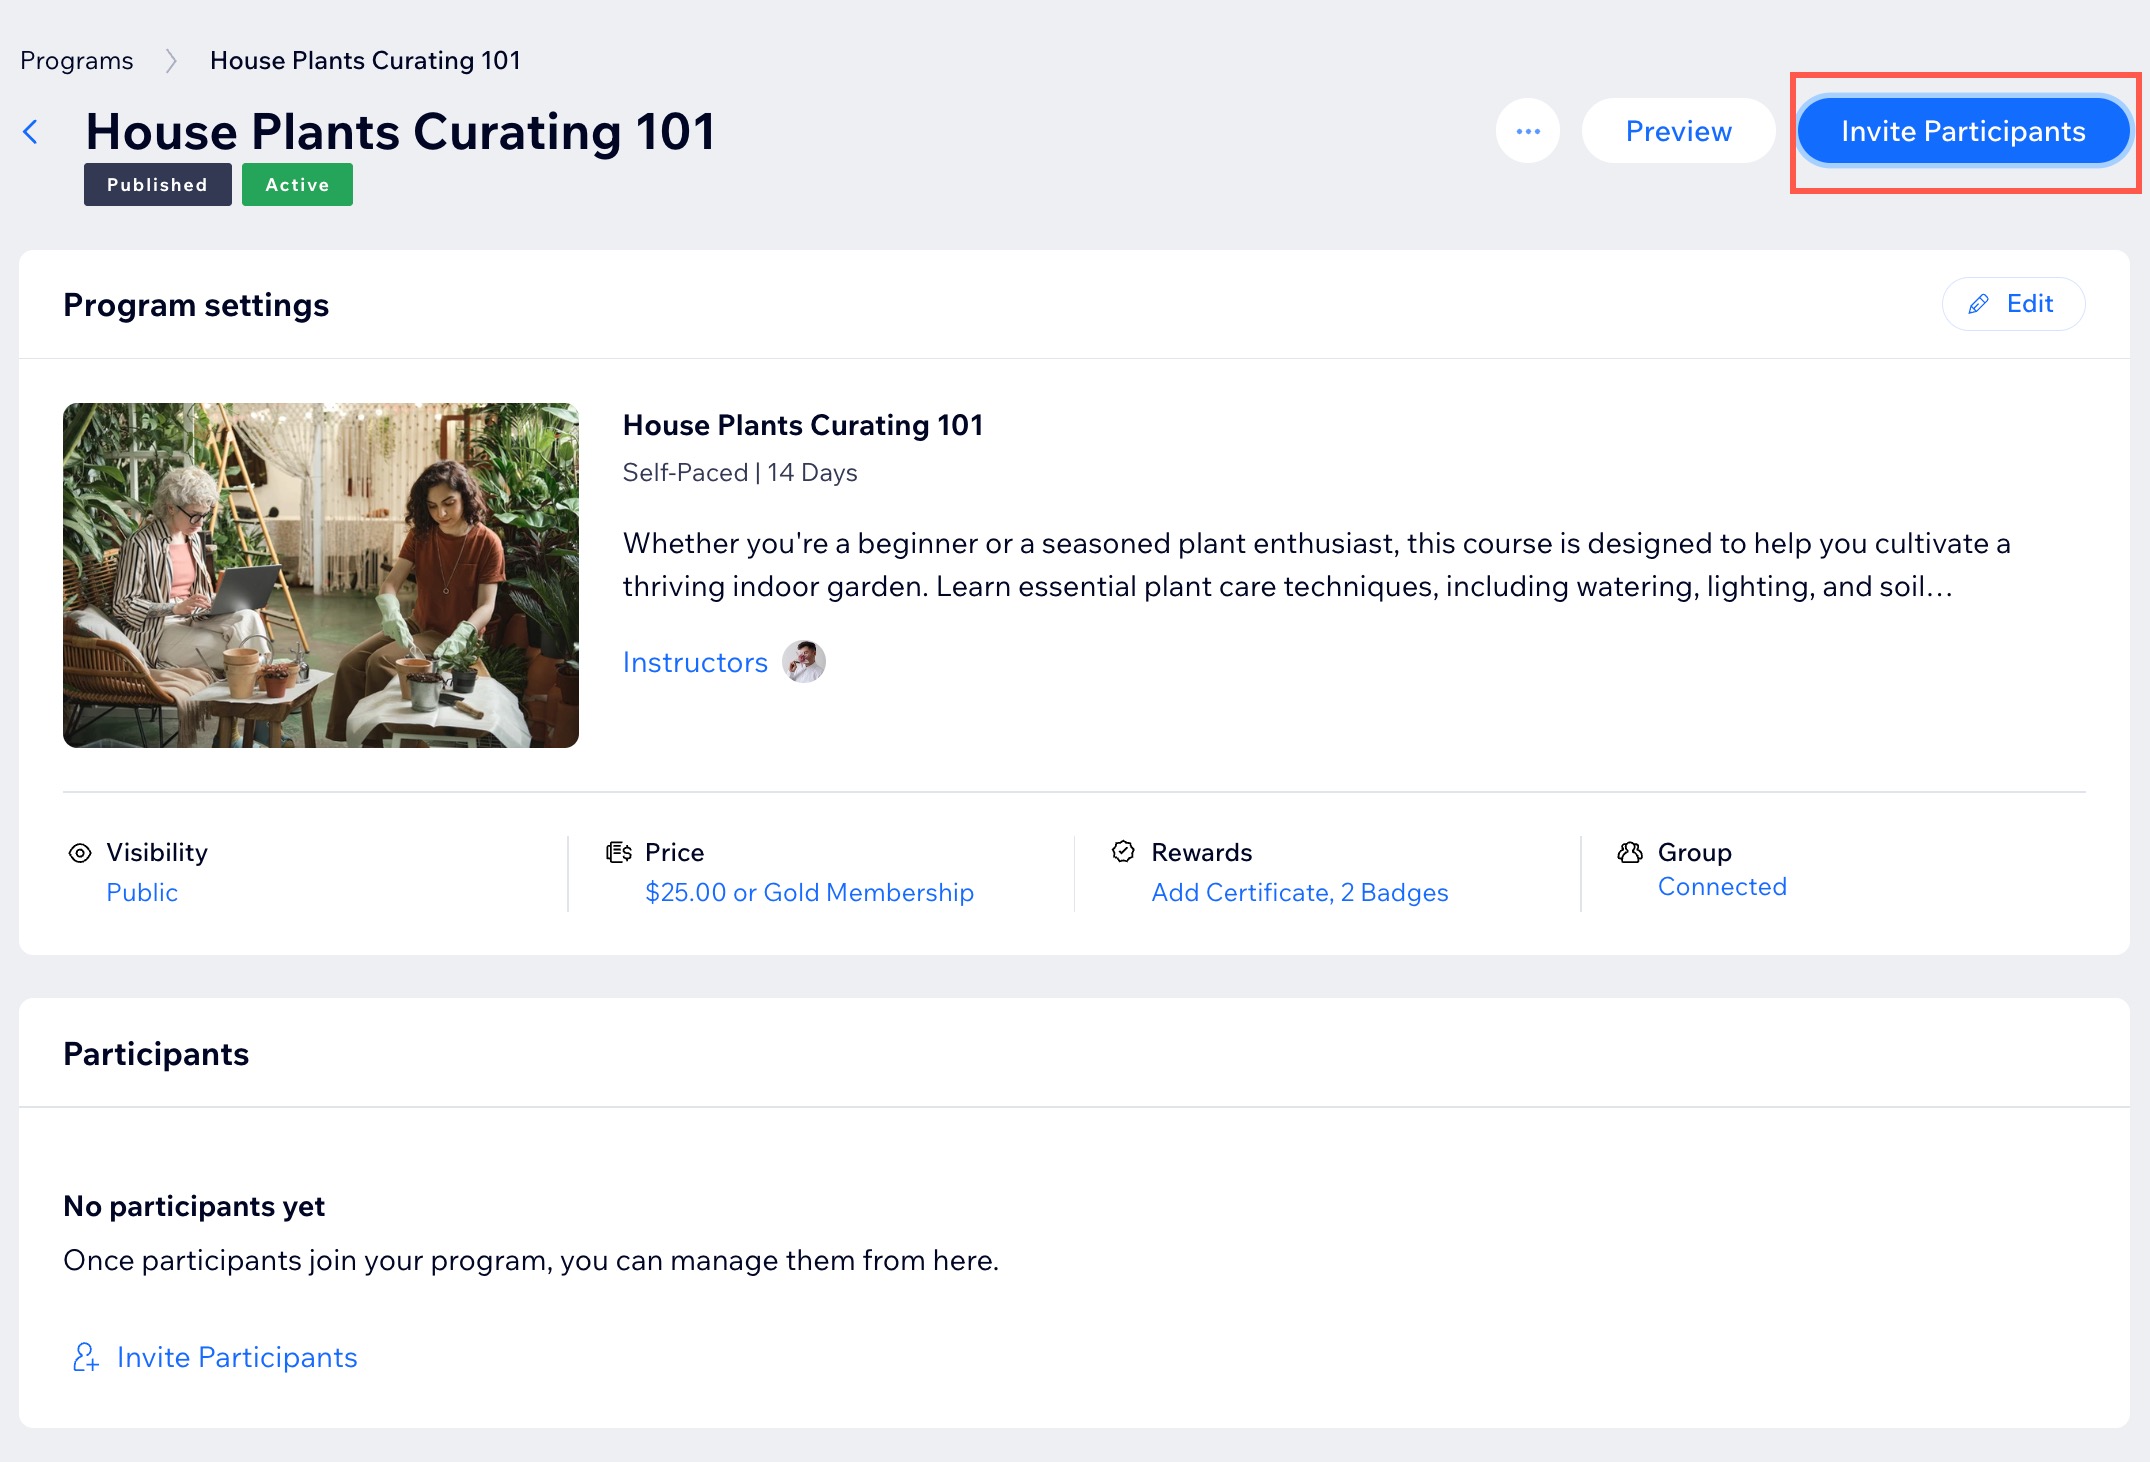
(Optional) Invite people to join your program:Click Invite Participants.
Choose how you want to invite people to join:Invite site members: Click Invite to Program and select the checkbox next to the relevant person. Then, click Invite to Program.
Share invite link to the program: Copy the link and share it with the people you want to invite.
Send an email campaign: Click Create Email Campaign to design an appealing email campaign that invites people to join your program.
