
Designing your plans pages
Pricing Plans: Customizing the Look of Your Pricing Plans Page
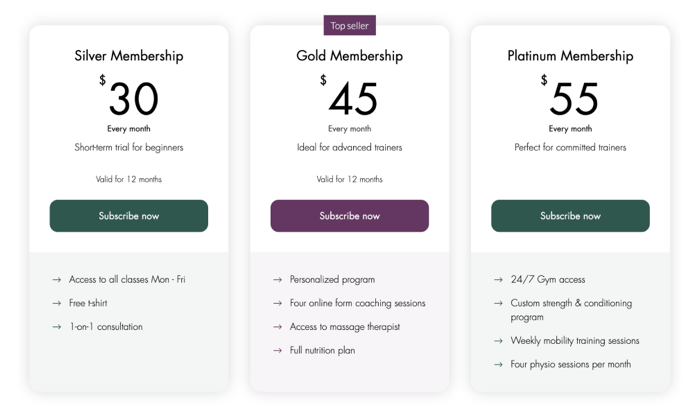
Customize the appearance of your Pricing Plans to complement your site's style and showcase the benefits your plans offer.
Encourage your visitors to sign up by adjusting the layout of your plans. You can also add stylized buttons and ribbons, format your text, and customize the background and color scheme.
Note:
We do not recommend adding any elements to the Plans & Pricing page. If you add elements, they automatically appear during checkout, hide important information and interfere with the process.
To customize the look of your Pricing Plans page:
Wix Editor
Studio Editor
Go to your Plans & Pricing page:Click Pages & Menu
 on the left side of the editor.
Click your Plans & Pricing page.
Click the Plans & Pricing element on your page.
Click Settings.
Edit the relevant settings:
Plans
Customize the look of the plans you display on your site.
Click the Plans tab on the left.
Click the relevant tab at the top:Show Plans: Select the checkboxes next to the plans you want to display on your site.
Reorder Plans: Click and drag the plans to change their order on your live site.

Tip: Click Create New Plan at the bottom to create a new Pricing Plan from your site's dashboard.
Layout
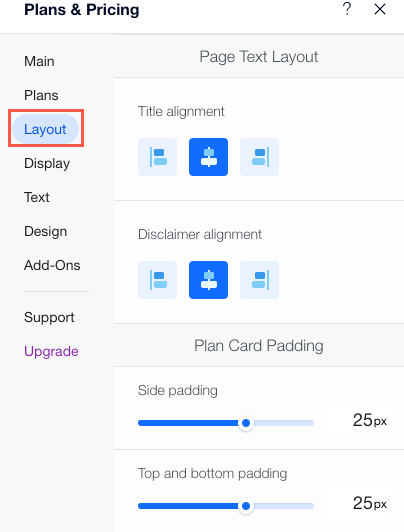
Click the Layout tab to customize how you arrange your pricing plans in the Pricing & Plans element, including the alignment, padding and bullet points style.
Display
Customize the look of your Pricing Plans page:
Click the Display tab.
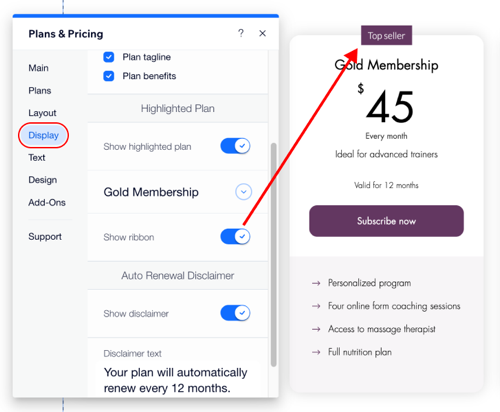
Customize the following options:What would you like to show?: Select the relevant checkboxes next to the plan elements you want to display under Plan Info.
Show highlighted plan: Click the toggle to add a highlighted plan of your choice. Then click the drop-down to choose the plan. You can enable the Show ribbon toggle to add a ribbon (e.g. 'Best Value') to your highlighted plan.
Show disclaimer: Click the toggle to show or hide a disclaimer that notifies customers when the plan renews:Enabled: An auto-renewal disclaimer appears underneath your plans. Enter the disclaimer text (e.g. Renews Monthly).
Disabled: No disclaimer appears.
Text
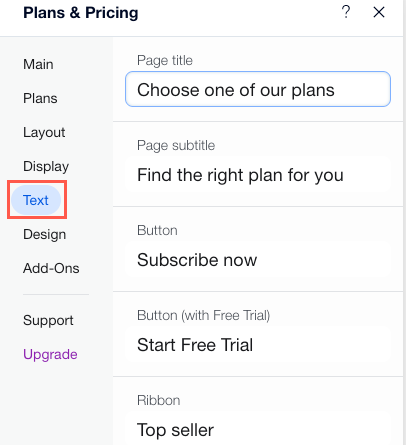
Edit the following text options that appear on your Plans & Pricing element:
Page title: The title that appears above the plans.
Page subtitle: The subtitle that appears above the plans. Here you can add more details or highlight newer plans, for example.
Button: The text that visitors click to select a plan.
Button (with Free Trial): The text that appears on a recurring plan for which you offer a free trial period.
Ribbon: The "Best Value" ribbon that appears on highlighted plans.
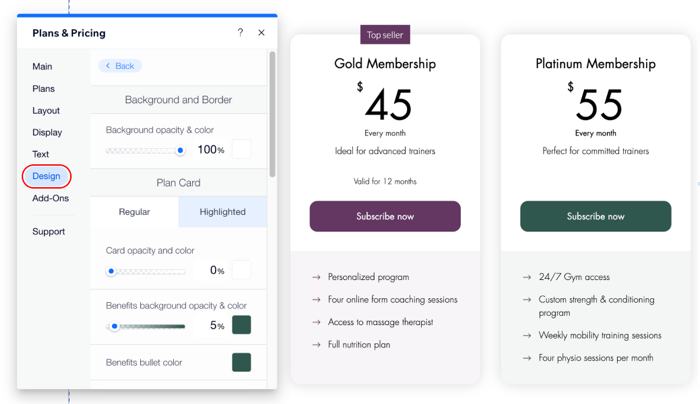
Design
Customize the backgrounds, borders, and text styles of your plans:
Click the Design tab.
Choose what you want to customize:
Background and Border: Set the background colors and opacity of your plans. Click the Highlighted tab to set the background & opacity of your highlighted plan.
Text Style: Select a font and color for each of the text options. Click the Highlighted tab to customize the text options of your highlighted plan.
Button: Select a button style and then customize it using the available options. Click the Highlighted tab to customize the button colors of your highlighted plan.
Ribbon: Customize how the 'Best Value' ribbon looks on your highlighted plan.
Tip: Click the Text tab to change the name of what appears on the ribbon.
Add-Ons
The Plans & Pricing Add-Ons allow you to add a list of your plans to any page of your site. This makes it easy for visitors to view and purchase your plans.
Click the Add-Ons tab.
Click the Add to Page drop-down next to the relevant add-on:Plan list: Showcase a hand-picked list of plans, on any page of your site.
Single plan: Display a single plan anywhere on this site.
Select which page should show the add-on.
