Managing your calendar & bookings
Wix Bookings: Adding and Setting up Waitlists
Waitlists are a great way to keep classes full while giving clients the chance to join if participants cancel or reschedule.
As slots become available, clients on your waiting list receive notifications. You set how long a client has to join the class before offering the slot to the next person on the waitlist. If no one on your waitlist chooses to book the class, the spot becomes open to the general public.

In this article, learn more about:
Enabling waitlists for classes
To get started, enable waitlists for your class from your booking settings. Then, decide how many participants can join the waitlist and how long a spot remains open for a client before it's offered to the next one.
To enable waitlists for classes:
Go to Settings in your site's dashboard.
Click Booking settings.
Click Booking policy.
Click the More actions icon
 next to the relevant policy.
Click Edit.
Scroll down to the Waitlist section.
Click the checkbox next to Allow clients to join a waitlist for fully booked classes.
Set the Maximum waitlist capacity.
Click the An open spot will be held for drop-down and select the duration. This sets how much time a client has to book before the spot is offered to the next client on the waitlist.
Click Save.

Enabling waitlists for classes on member apps
Add an Agenda widget to your site using the Wix app, so clients can join class waitlists from their member app. When a class is fully booked, clients will see a Waitlist button on their member app.
Waitlists allow clients to book classes spontaneously, so it's a great way to keep your classes as full as possible.
Important:
Without an Agenda widget on your mobile site, your members can't join waitlists for classes from their member app. Members cannot join the waitlist from the Services or Upcoming Sessions widgets.
To enable waitlists for classes on member apps:
Go to your site in the Wix app.
Tap Manage
 at the bottom.
Tap Site & App
 .
.Tap Customize under Members App.
Tap + Add Element.
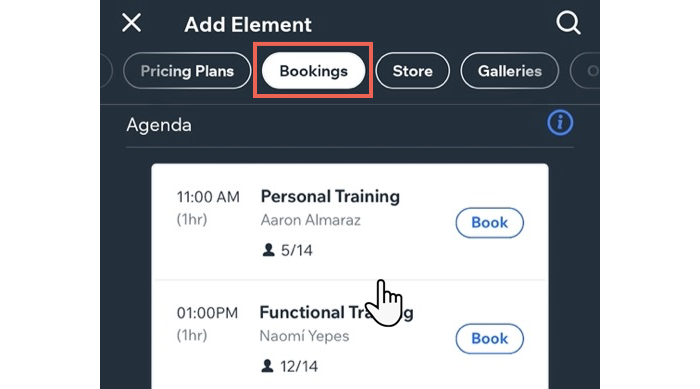
Scroll across to Bookings at the top.
Tap Agenda under Bookings.

(Optional) Enable the Element title toggle to give your Agenda tab a custom name.
(Optional) Tap Element visibility and choose from the following options:Android: Only display the Agenda widget in member apps on Android devices.
iOS: Only display the Agenda widget in member apps on Apple devices.
Both: Display the Agenda widget on both Android and Apple devices.
Tap Add at the top left.
Tap Done.
Adding a client to a waitlist
You can add clients to your waitlists manually. This is a way to offer great customer service and ensure your classes remain as full as possible.
To add a client to the waitlist:
Go to Booking Calendar in your site's dashboard.
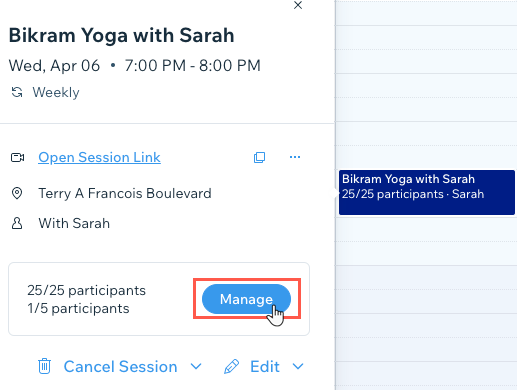
Click the relevant class in your calendar.
Click Manage next to participants.

Click the Waitlist tab at the top.
Click + Add to Waitlist at the top right.
Choose what you want to do:Add an existing client: Enter the name of the client and select them from the list.
Add a new client:Click the Name field.
Select + Add Contact from the drop-down, enter the client's details and click Save.
6. Click Save.
Moving a client from the waitlist to the participant list
Move a client from the waitlist to a session at any time, even if the session is full.
To move a client from the waitlist to the participant list:
Go to Booking Calendar in your site's dashboard.
Click the relevant session in your calendar.
Click Manage next to participants.
Click the Waitlist tab.
Hover over the client and click Add to Session.

Click the Payment drop-down under How will you charge your client?. Then select the relevant payment option:Charge with invoice: Email or print out the invoice for a client.
Use client's plan: Use a client's pricing plan or membership package to pay for the session as soon as it is scheduled.
Use client's plan later: Charge a client from their pricing plan or membership package through the Manage Participants page.
Collect payment later: Charge a client from the Manage Participants or Orders page.
Mark as paid: Select this option if the client has paid in-person for the session.
(Optional) Select the Send confirmation email to participant checkbox to let the client know they have a place in the session.
Click Save.
Removing a client from the waitlist
You can take a client off the waitlist to ensure that available slots are filled promptly and efficiently. This is a great way to help minimize wait times and maximize appointment opportunities for clients.
To remove a client from the waitlist:
Go to Booking Calendar in your site's dashboard.
Click the relevant session in your calendar.
Click Manage next to participants.
Click the Waitlist tab.
Click the More Actions icon
 .
.Click Remove.
Click Remove to confirm.
FAQs
Click a question below to learn more.
Can I manage waitlists clients through the Wix app?
Yes, you can. Learn more about managing your waitlists clients using the Wix app.
Can clients join waitlists on their desktop and mobile apps?
Clients can only join a waitlist through their Wix mobile apps. If they try to book from your site, they're prompted to download a Wix mobile app.