Wix Contacts FAQ
Wix Contacts: Managing Your Contact List
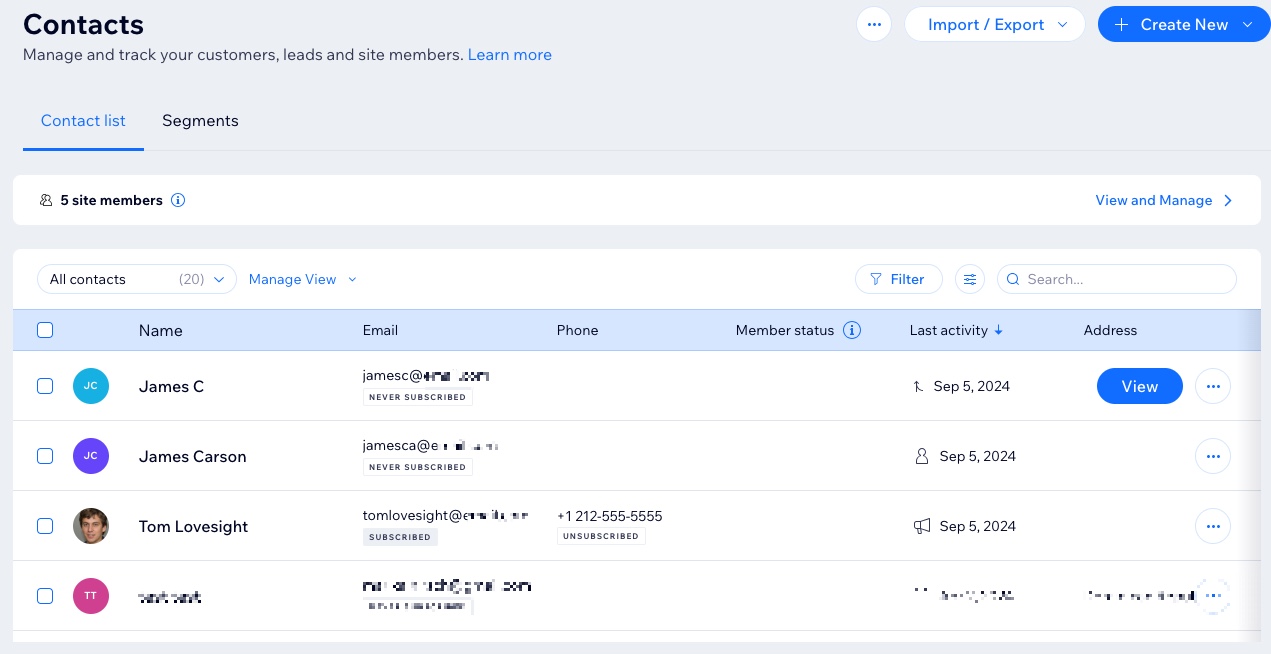
View and manage every contact on your site in your contact list. Add new contacts, edit information, filter your list, merge duplicate contacts, and delete unnecessary contacts. Keeping a well maintained contact list helps you stay organized so you can effectively manage your business's communication and marketing efforts.

Editing a contact
You can edit a contact's information at any time to update their details or add new details or custom fields that are relevant to them.
To edit a contact:
Go to Contacts in your site's dashboard.
Click the More Actions icon
 next to a contact and select Edit.
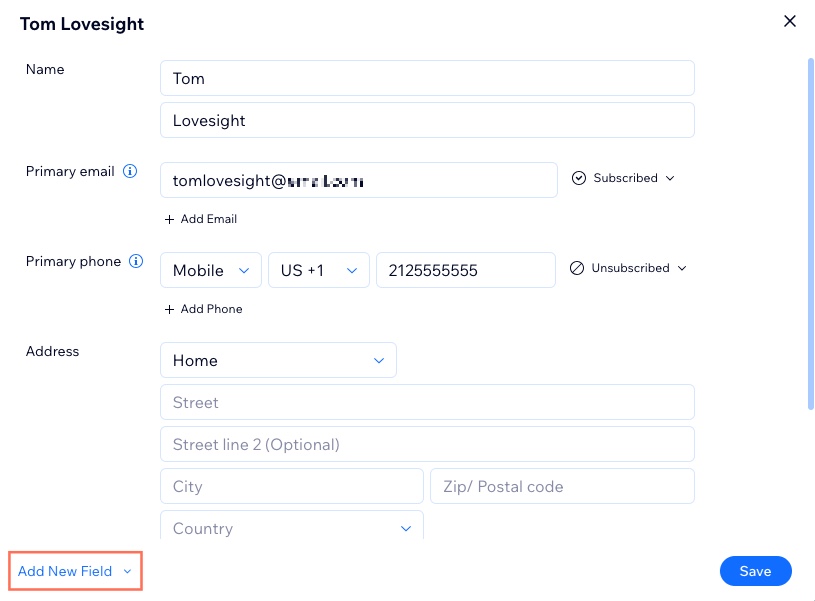
Edit the contact's information.
(Optional) Click Add New Field at the bottom to add a new information field such as phone number, email, birthday. You can also create a custom field.
Click Save.

Merging contacts
If the same person uses different contact information on your site, it's possible that duplicate contacts can get created. You can merge up to 5 contacts into 1. The contact card displays information from all the merged contacts, including labels and activity data.
To merge contacts:
Go to Contacts in your site's dashboard.
Select the checkbox next to the contacts you want to merge.
Click Merge at the top of the contact list.
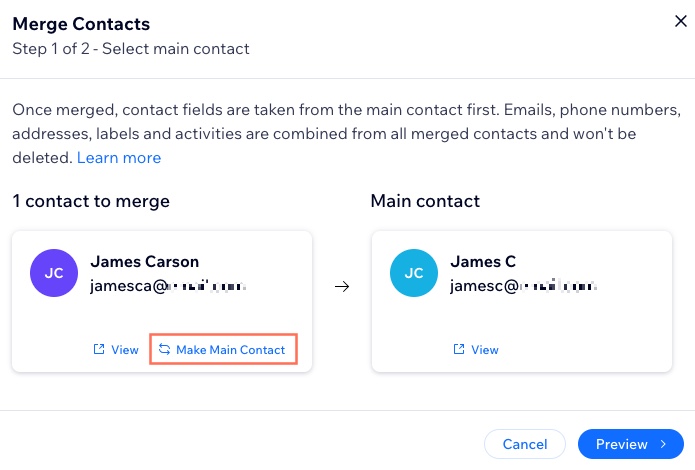
View the main contact and contact to be merged. If you need to swap them, click Make Main Contact under the merged contact. If one contact is a site member, it must remain the main contact.

Click Preview to review the new contact information.
Note: If you need to change the main contact, click Back.Select the checkbox to confirm.
Click Merge Contacts.
Deleting a contact
Clean up your contacts by deleting contacts you no longer need. You can delete a single contact or multiple contacts at once.
To delete a contact:
Go to Contacts in your site's dashboard.
Select the contact(s) you want to delete.
Click Delete at the top right of the contact list.
Tip:
You can also delete a contact by viewing their individual contact card and clicking the More Actions icon  under their name. Select Delete from the options.
Want to restore deleted contacts?
Contact us with your site name and URL. If possible, a Customer Care expert will restore your contacts. It is not possible to restore individual contacts.
Filtering your contact list
Apply filters to your contact list to quickly find the contact(s) you need. You can filter by segment, label, subscription status, last activity, and more.
To filter your contact list:
Go to Contacts in your site's dashboard.
Click Filter at the top of the contact list.
Select a filter from the available options.
(Optional): Save the filter as a customized view:Click Manage View at the top of the contact list.
Click Save as new view.
Add a name for the view.
Click Save.
Note:
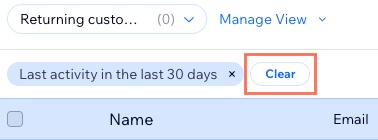
To remove a filter, click Clear next to the applied filter label.

FAQs
Click a question below to learn more about managing your contacts.
How do I search for a specific contact?
There are a few different ways you can find contacts in your list. You can filter the list, sort the list columns, or use the search bar at the top of the list.
Go to Contacts in your site's dashboard.
Choose what you want to do:Search: Enter the contact's name or email address in the search bar.
Filter: Click Filter at the top right and select from the available options.
Sort: Click a column heading (e.g. Name). If an arrow appears beside the heading, it can be used to sort your contacts. Click the arrow to sort in ascending or descending order.

Can I add custom fields to my contacts?
Yes. You can add custom fields to store additional information about a contact. To add a custom field, edit the contact info and click Add New Field at the bottom left of the contact card. Once you create a new custom field, it appears in the filter options of the contact list. Learn more about custom fields.

Can I customize the columns on the contact list?
Yes. You can customize the columns to show the information that's most relevant to your business. You can show up to 5 columns at a time.
To customize the contact list columns:
Go to Contacts in your site's dashboard.
Click the Filter icon
 at the top right of the list.
Select the columns you'd like to display.
Drag your columns up and down the list to reorder them.
Note: Columns that aren't featured on the list still appear you select a contact.
How do I change a contact's subscription status?
Keep a contact's subscription status up-to-date to remember the type of email or SMS content you can send them. To update a contact's status, edit a contact and click the subscriber status drop-down next to Primary email or Primary phone. Then select the relevant status. Learn more about changing a contact's subscription status.

What happens when I merge two site members?
If you want to merge two site members, you must first delete one of the site members. Once you have deleted a site member, they still appear in your contacts. You can then merge the contacts as normal.
Note: When you delete a site member, their subscriptions are canceled and they can no longer log in to your site.
Can I set a default view for my contact list?
Yes. Once you have created the view you want to set as default, save the new view. Then click the Manage View drop-down at the top of the contact list and select Set as default view. This view will now appear whenever you open your contact list.

How do I update a contact's profile photo?
Go to Contacts in your site's dashboard.
Select the contact you want to update.
Click the Photo icon
 next to the contact's name.
Upload the relevant photo from your computer.

Note: When a contact joins your site as a member, they can upload their own photo from the Member's Area. If your contact already has a profile photo, hover over it and click the Photo icon  to replace it.
Can I filter my contact list by contacts who have been in touch with me before?
Filter your list by the contacts who have contacted you before (e.g. submitted a contact form) to see who has communicated directly with you.
Click Filter at the top right of the contact list.
Click Label.
Select "matches any of" and then the "Contacted Me" label.
