
Creating your event
Wix Events: Hosting a Live Streaming Event
Use Wix Video to live stream your event to all your guests - as it happens. When the live stream is over, choose whether you want to display a video of the event on your site. You can charge visitors to view past events or offer them for free.
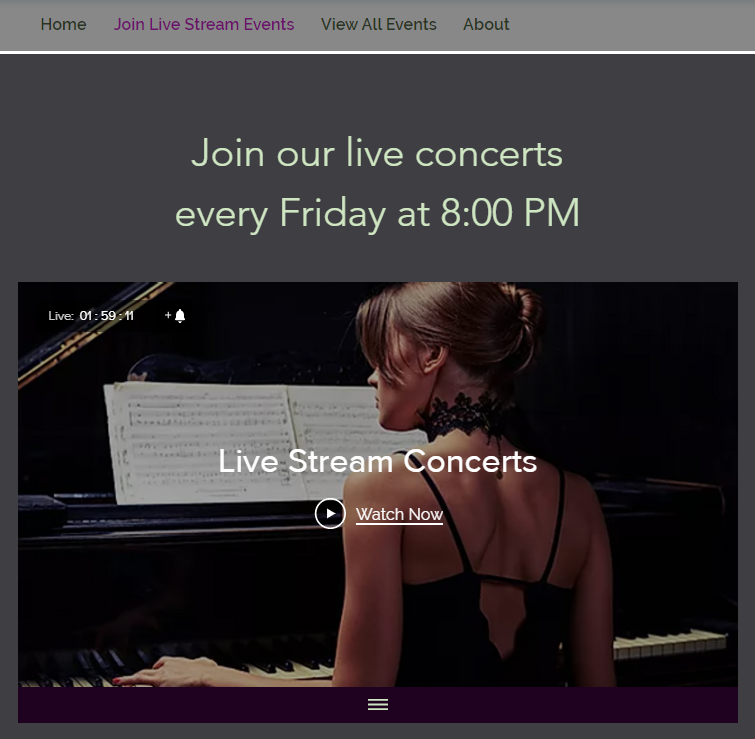
Step 1 | Set up a live stream page
To get started, decide where on your site guests can view your live streaming event. To do so, you can add a new page to your site or edit an existing page.
Step 2 | Set permission levels
Now that you know where the live stream videos will go, decide who has access to the page. You can choose to let any site visitor click through to the page, restrict access to password holders, or let visitors have access only after they log in to your site.
Show me how
Click Pages
 on the left side of the Editor.
Select your live streaming page.
Click the Show More icon
 .
.(Optional) Click Hide to hide the page from your site's menu.
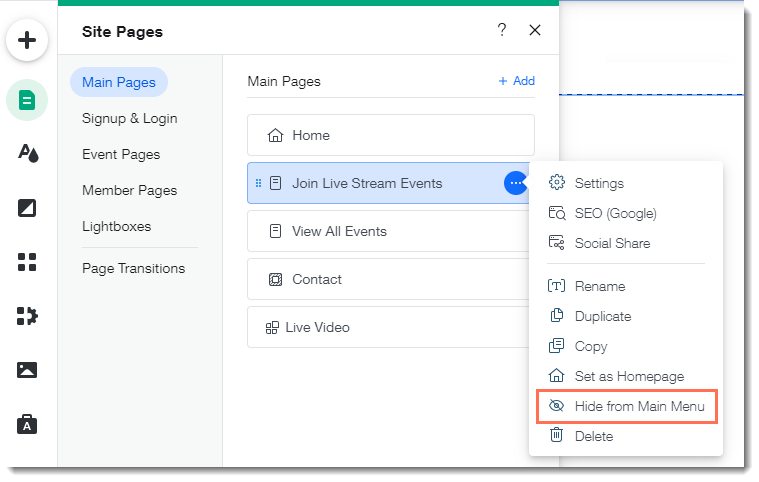
Click Settings.

Click the Permissions tab.
Select one of the following options under Who can view this page?:Everyone: The page is public and open to all visitors.
Password Holders: Only people who have the password can view this page.
Tip: If you select this option, make sure to send the password to registered guests.Enter a password.
Select the language for the login screen.
Members Only: Site visitors who try to access this page are prompted to sign up and log in.
Note: To use this option, be sure to add a Member's area to your site.Select the language for the login screen.
Select who is able to become a member:All members: Since you are using Wix Events, you can select All members and optionally charge to view the live stream by selling access to the event.
Only selected members or paying customers: This option allows you to limit access to people specific member roles or to charge for access to a page using the Pricing Plans app.
Click Done.
Step 3 | Add and set up Wix Video
To live stream an event, add Wix Video to the page you prepared in step one. Next, create a Wix Video channel for all your live stream events.
Show me how
Add Wix Video:
Click Add
 on the left side of the Editor.
Select Music & Video.
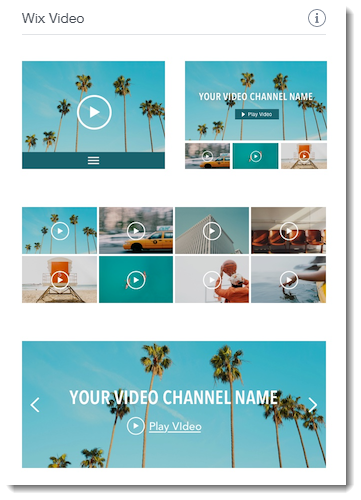
Drag one of the Wix Video options onto your page.
Create a video channel:
Click the Wix Video player you added.
Click Manage Videos.
Click the Channels tab.
Click New Channel and select Channel.
Click Edit on the right.
Enter the channel's name.
(Optional) Add a short description (appears in the channel info).
Note: Make sure you enable Show channel info in the channel settings.Click upload to add a video or image as your channel cover. The video can be up to 100 MB, and plays in the background without audio. If you add a gif or a video, they play silently in the background on your live site. Cover videos do not play in mobile view.
Disable the Channel Subscriptions toggle since you are allowing access through Wix Events.
Click Save.
Step 4 | Download, install, and set up the live stream encoder
An encoder is software used to connect your computer's camera to a live stream. To create a live stream event using your computer, you need to download the OBS encoder, install it, and connect it to your computer's camera. Once that's done, you can customize the settings. For complete instructions, click here.
Step 5 | Create your event in Wix Events
Now you can go to the Events tab in your site's dashboard and create your event. Select "Online" as the location. After creating the event, you have the option of creating tickets to monetize your live stream.
Show me how
Go to the Events tab in your site's dashboard.
Click +Add Event.
Select a type of event (this selection can't be changed after you click Create Event):Ticketed Event: Sell event tickets
RSVP Event: Guests register for the event.
Enter the event date, time, and timezone.
Tip: Click the Display timezone checkbox so international participants understand when the event takes place.Under Where this event is taking place?, select Online.

Enter an Online Location Title (e.g. Webinar).
Tip: This appears on your site instead of an event address.Click Create Event.
(Optional) Create event tickets.
Step 6 | Inform guests how to access the live stream
Make sure you give guests the information they need to access the live stream page. This includes:
The URL of the site page where your events are broadcast
The page password, if you made the page accessible only to password holders
Note:
If you made the page accessible only to members, and set it so you must give approval before guests become members, make sure to approve their requests as they try to access the page.
To inform guests how to access the live stream, add the access information to any of the following:
The Wix app on your mobile device:You can broadcast a message to all of your guests.
You can create a discussion in the discussion feed.
Step 7 | (Recommended) Hold a test live streaming event
To set your live stream event in motion when the day comes, you need to follow a few steps. Usually they need to be done about 60 minutes before the event starts, but it's recommended to familiarize yourself with the process before your first live stream.
We recommend you follow the instructions in Step 8 below a day or more before your actual event, and make sure others are able to view the live stream.
Step 8 | Hold your live streaming event
When it's time to hold your event, go to the Live Stream tab in your site's dashboard and set up the live stream. You have two options:
You can schedule the event in advance and go back to the event when it's time to go live to complete the last steps.
You can create the live stream close to your event.
Show me how to schedule a live stream in advance
Plan the event:
Go to the Video Library in your site's dashboard.
Click the Live Stream tab.
Click Schedule Event.
Choose the Wix Video channel you created for your live stream events.
Select the date and time you plan to go live.
In the Video Info section, enter a video title.
(Optional) Add a video cover image, enter publisher, categories, tags, or description.
Complete the Video Pricing, Show a Trailer, More About This Video, and Let viewers Embed this Video sections. Learn more
Click Save.
The event now appears as an upcoming stream in the Live Stream tab.

When it's time to go live:
You can now create the live stream links. Note that these links expire after 60 minutes.
Go to the Video Library in your site's dashboard.
Click the Live Stream tab.
Click Go Live Now on the event you created.
Select From desktop.
Click I Have an Encoder.
Copy the Server URL link.
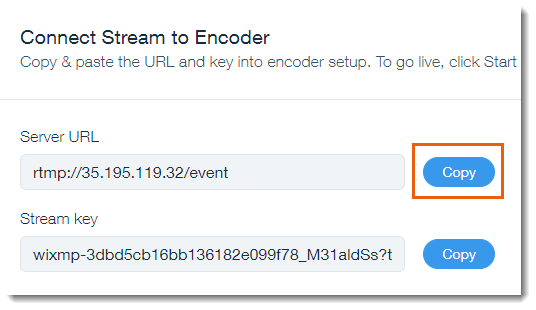
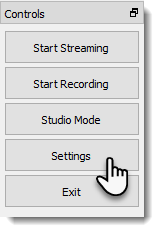
Open the OBS Studio Encoder on your computer.

Click Settings on the bottom right.
Click the Stream tab on the left.
Select Custom from the Service drop-down menu.
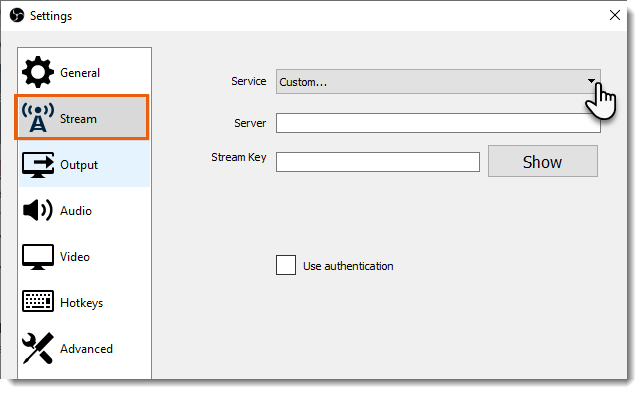
In the encoder, paste the URL you copied in the Server field.
Copy the Stream Key link.
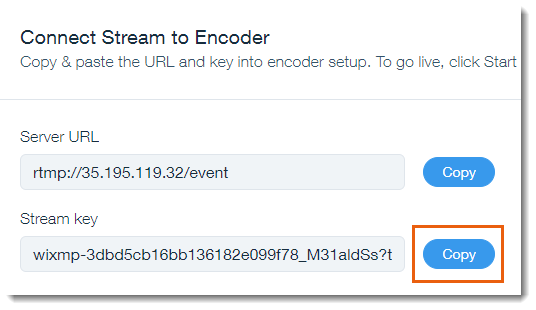
In the encoder, paste it in the Stream Key field.
Click OK.
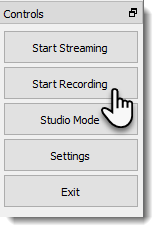
Click Start Recording on the right to start streaming.
Show me how to go live now
After you fill in the necessary information, two live stream links are created. Note that these links expire after 60 minutes.
Go to the Video Library in your site's dashboard.
Click the Live Stream tab.
Click Schedule Event.
Click Go Live Now and select From desktop.
Click I Have an Encoder.
Choose the Wix Video channel you created for your live stream events.
In the Video Info section, enter a video title.
(Optional) Add a video cover image, enter publisher, categories, tags, or description.
Complete the Video Pricing, Show a Trailer, More About This Video, and Let viewers Embed this Video sections. For information on these sections, click here.
Click Next.
Copy the Server URL link.

Open the OBS Studio Encoder on your computer.

Click Settings on the bottom right.

Click the Stream tab on the left.
Select Custom from the Service drop-down menu.
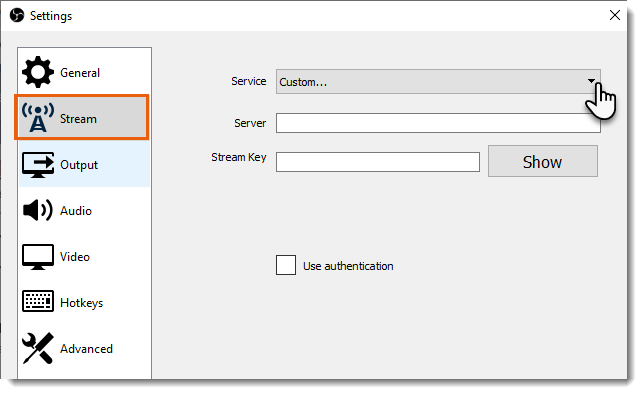
In the encoder, paste the URL you copied in the Server field.
Copy the Stream Key link.

In the encoder, paste it in the Stream Key field.
Click OK.
Click Start Recording on the right to start streaming.

