Wix Forms FAQ
Wix Forms: Adding and Managing Rules
Rules improve the way you collect form information based on your visitor responses. Your visitor's input in one field in the form can determine if another field should be shown, hidden, required or optional.
Each rule includes a condition and an action: If your visitor fills a certain field or leaves it blank (condition), another field in your form reacts accordingly (action). You can also make your form react to a specific selection a visitor makes in a multiple-selection field.
Read an example of how one business uses rules for their forms
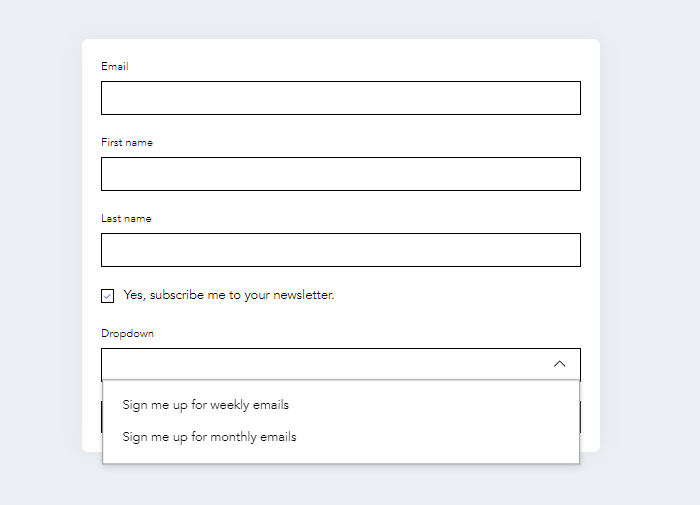
Jane is a fitness instructor. In her contact form, she wants to give clients the option to subscribe to marketing emails about class promotions. If they subscribe, she wants to then give them control of how they receive marketing emails.
Jane sets up a rule whereby if someone checks the "Yes, subscribe me to your newsletter", then a dropdown field is shown. The dropdown is set to offer weekly or monthly email options.
If the client does not check the "Yes, subscribe me to your newsletter" field, then the dropdown is hidden.


Creating new rules
Rules allow you to personalize the user experience. Customize the form based on user choices and create a tailored interaction for your visitors. For example, set up a rule whereby the visitor's selection on a specific field determines what field appears next.
To create new rules for your form:
New Forms
Old Forms
Click the relevant form in the editor.
Click Edit Form.
Click the Rules icon
 on the right.
Click + Add Rule.
Note: To enable Rules, your form must have a minimum of 2 fields.Fill out the sections:
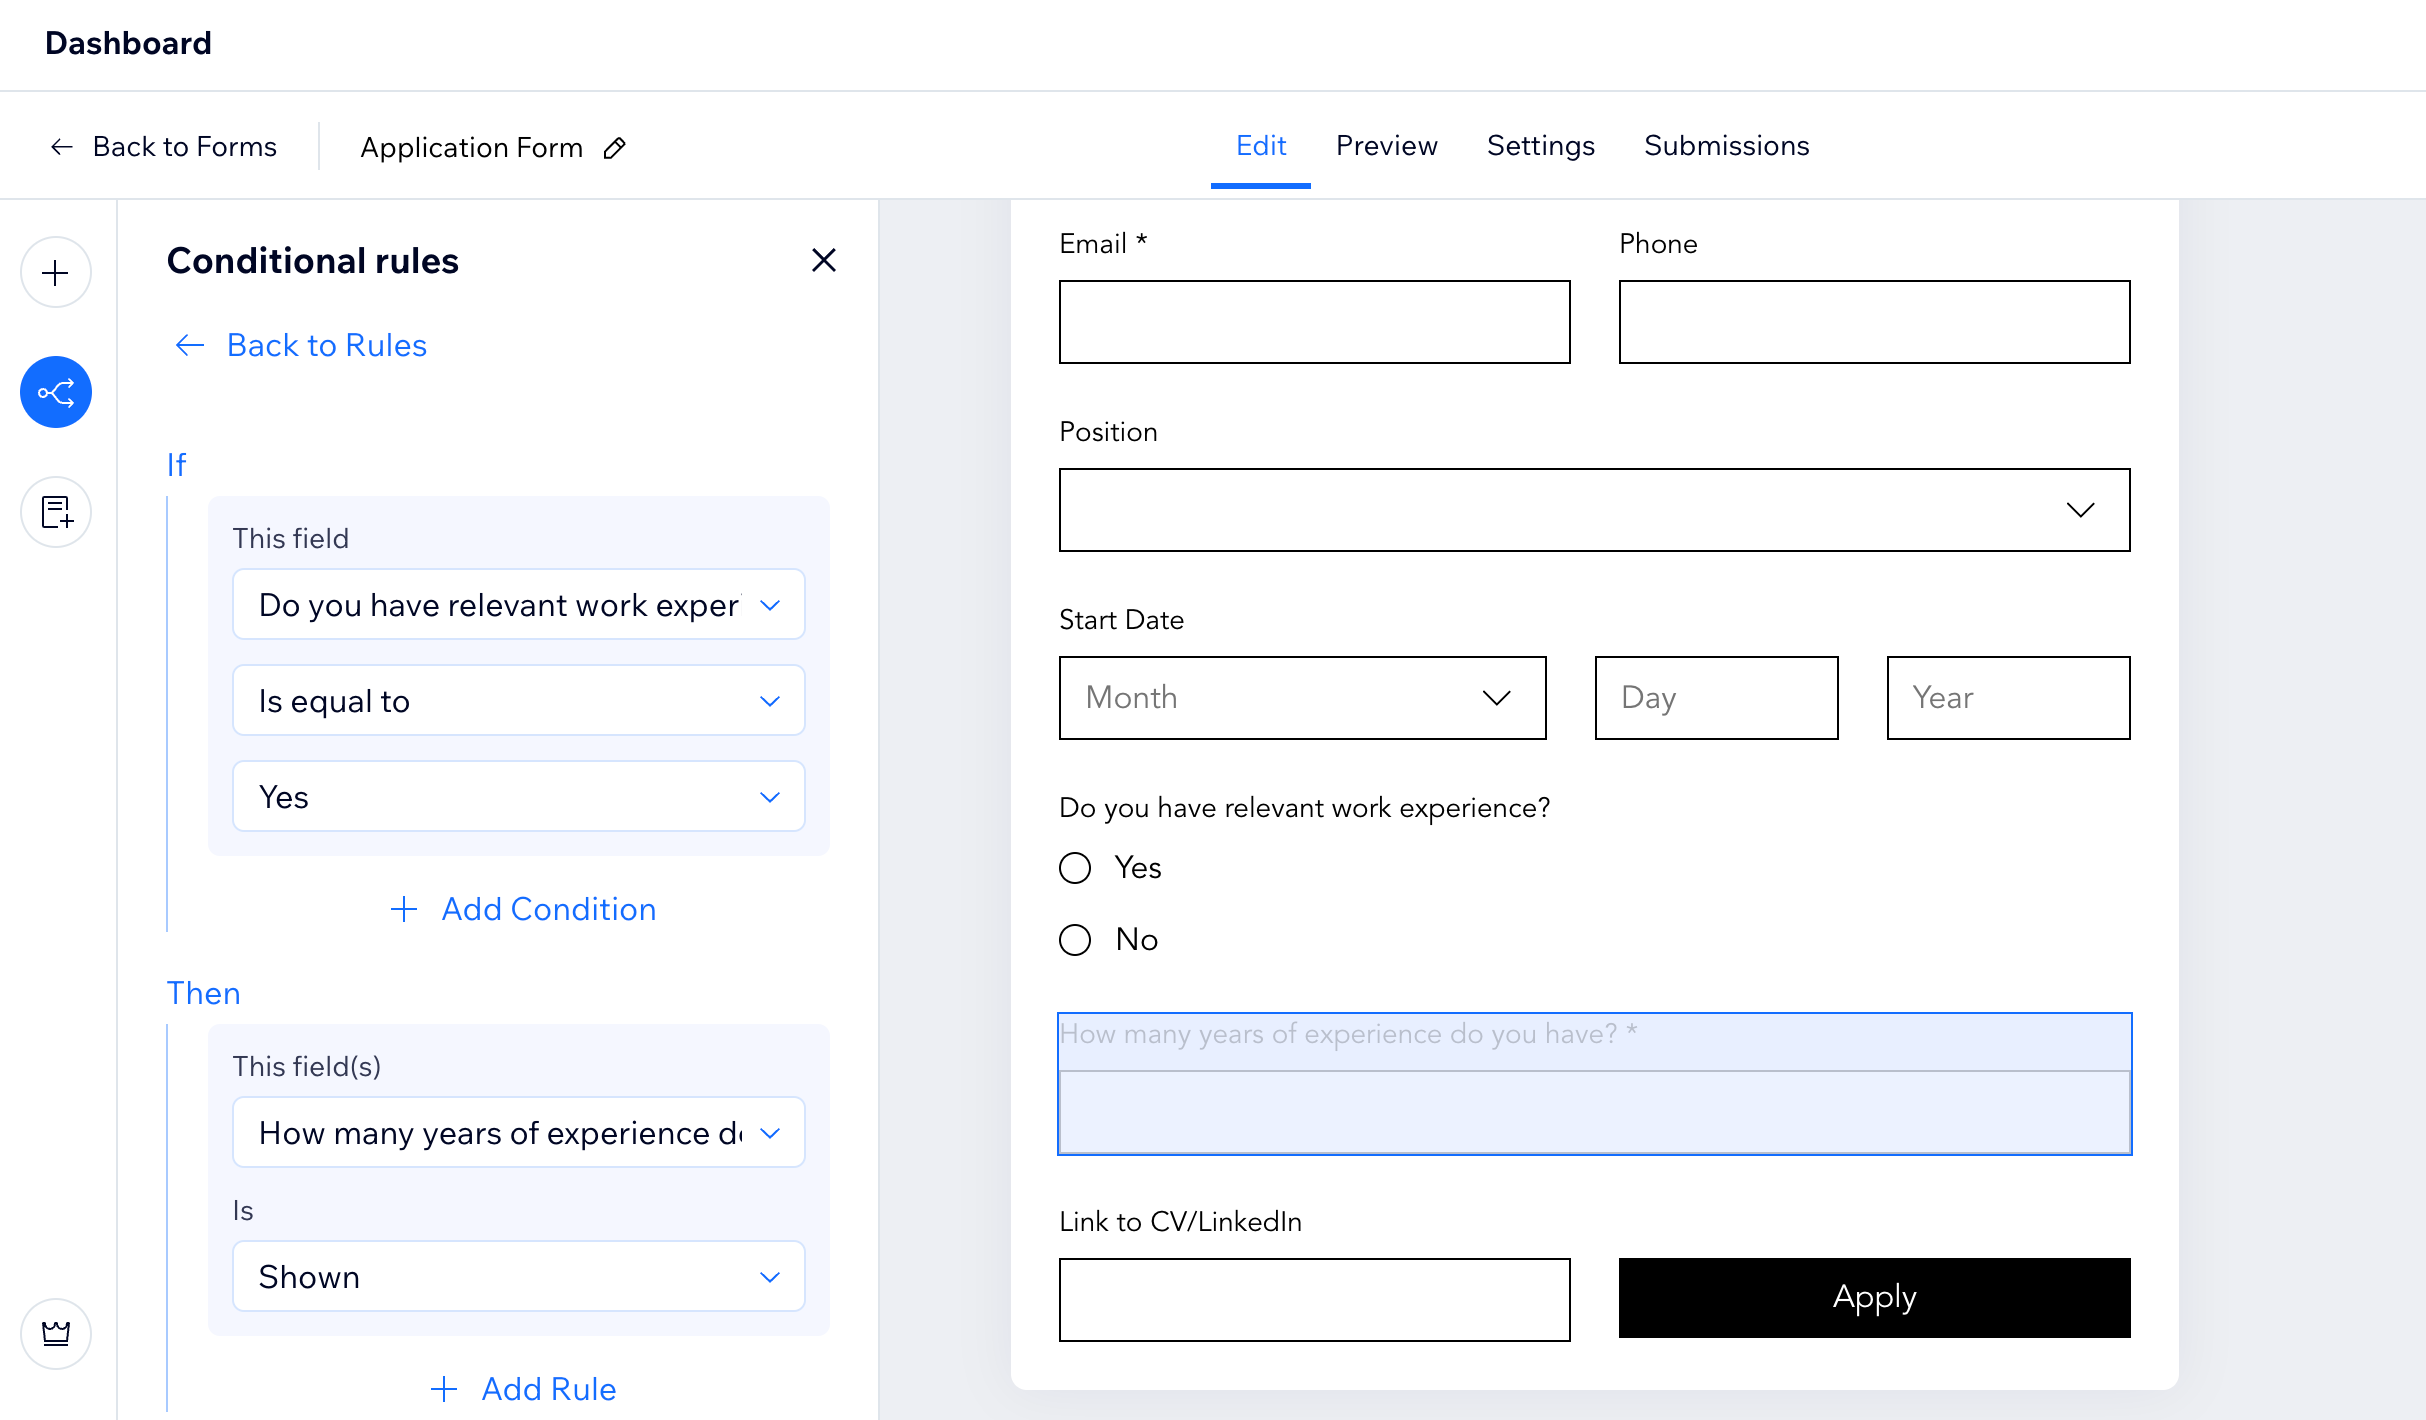
Choose a condition (If)
Select the field you want to base the rule on from the drop-down under This field.
Select the condition for the rule from the drop-down (e.g. is empty, is filled, is equal to, etc.).
(Optional) Add another condition to this rule.Click + Add Condition to add another condition.
Choose if the conditions should be combined with And or Or.And: Both conditions need to be met.
Or: Either condition needs to be met.

Decide on the result (Then)
Select the field you want to base the rule on from the drop-down under This field.
Select the condition for the rule from the drop-down (e.g. is hidden, shown, optional, required).
Tip: You can select more than one field to apply the same result.(Optional) Click + Add Rule to add another rule.

6. Click Save Rule.
7. Click Save at the top right to save the form.
What's next?
Your rule is now saved. Publish these changes to ensure that the next user completing your form will see the updated rule.
Managing your form's rules
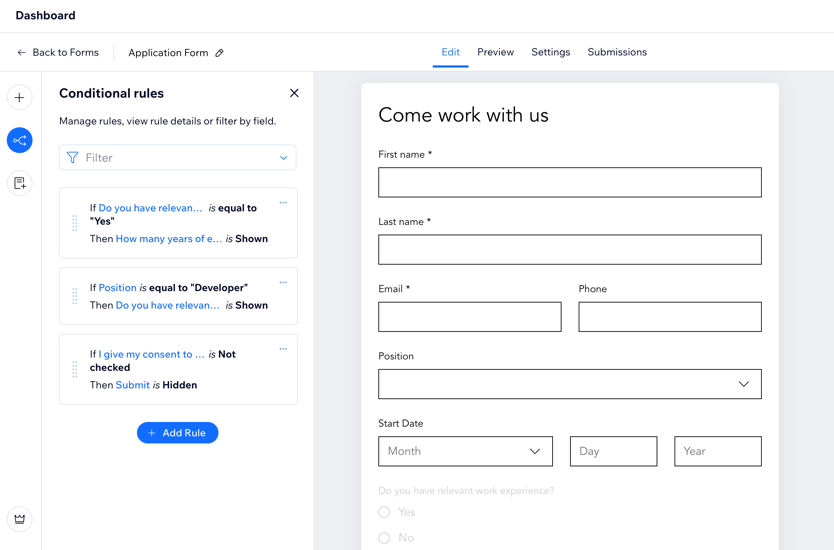
Your form's rules are saved in one place, so you can keep track and modify them as needed. If your form includes a lot of rules, use filters to quickly find the rule you want to check or edit. Reorder the rules so they're easier to work with and delete ones you no longer need.
To manage your form's rules:
New Forms
Old Forms
Click the relevant form in the editor.
Click Edit Form.
Click the Rules icon
 on the right.
Choose what to do:
Filter the rules
Use the filter to find rules that contain a field you're looking for. For example, if you're looking to edit all rules that require a user to fill out their email, use the filter to find all rules that contain Email.
Click the Filter drop-down.
Select the checkboxes next to the relevant fields.
Click Save at the top right to save the form.
Edit a rule
Click the More Actions icon
 next to the relevant rule and select Edit.
Make the necessary changes.
Click Save Rule.
Click Save at the top right to save the form.
Reorder rules
Click and drag a rule to change the order.
Click Save at the top right to save the form.
Delete a rule
Click the More Actions icon
 next to the relevant rule and select Delete.
Click Save at the top right to save the form.
Want to add more rules?
Click + Add Rule to add more rules to your form.

Troubleshooting form rules
If your form's rules aren't working, review the rules and look for a solution below.
To troubleshoot your form's rules:
New Forms
Old Forms
Click the relevant form in the editor.
Click Edit Form.
Click the Rules icon
 on the right and review the Conditional rules list.
Look for a solution to the issue:
A rule is broken
A broken rule means that a field in the form was deleted.

To resolve this issue, do any of the following:
Restore a deleted field:Click the Add icon
 on the right.
Click Deleted fields.
Click the More Actions icon .
.
Click Restore field.
Click Save at the top right to save the form.
Edit the rule:Click the More Actions icon
 next to the relevant rule and select Edit.
Find the deleted field and select a different field from the drop-down.
Click Save Rule.
Click Save at the top right to save the form.
Delete the rule:Click the More Actions icon
 next to the relevant rule and select Delete.
Click Save at the top right to save the form.
A field's choice was deleted
If your rule refers to a specific option in a choice field (single choice, multi choice, or dropdown) and you delete that option, the rule will not apply in the form.
To resolve this, do any of the following:
Re-add the missing option:Select the field in the form.
Click + Add Option on the right.
Type in the name of the option.
Note: The name must be typed the same way for it to connect to the rule.
Click Save at the top right to save the form.
Edit the rule:Click the More Actions icon
 next to the relevant rule and select Edit.
Find the empty field and select a different field from the drop-down.
Click Save Rule.
Click Save at the top right to save the form.
Delete the rule:Click the More Actions icon
 next to the relevant rule and select Delete.
Click Save at the top right to save the form.
A rule conflicts with another rule
If you have conflicting rules, the last rule added is the one that gets applied.
To resolve this, review your rules that have the same condition and use the same field for the result. Then, do any of the following:
Edit a rule: Change a rule so the rules don't conflict.Click the More Actions icon
 next to the relevant rule and select Edit.
Make the relevant changes to the rule.
Click Save Rule.
Click Save at the top right to save the form.
Delete a rule:Click the More Actions icon
 next to the relevant rule and select Delete.
Click Save at the top right to save the form.
Add a rule: Click + Add Rule and follow the steps.
For example, if you have 2 rules that begin with "If a choice field is equal to Option 1," with one rule stating "Then a short answer is optional" and the other stating "Then a short answer is required.", you need to delete one of the contradicting rules.

Test your form rules in the Preview tab at the top.
FAQs
Select a question to learn more about rules on your site.
How many rules can I add to my form?
You can add up to 3 rules when using Wix Forms for free. To get more, upgrade your site.
Can I make a field mandatory?
Yes, when you select the rules for a field, you can choose to make the result required.
For example, if the field "Do you have relevant work experience?" is filled out, you can choose to make the field "How many years of experience do you have?" required.

How can I see what my rule looks like on my site?
You can see your new rule in action by previewing your form (for New Forms) or previewing your site in the editor (for Old Forms).
