Wix Forms FAQ
Wix Forms: Managing Your Standalone Form Fields
When creating your standalone form, or when revisiting it, you can make changes to ensure your form flows the way you want and captures all the necessary information. Customize your standalone form fields with contact and basic fields, and make changes to the fields as you see fit.

Note:
Standalone forms are only available when using old Wix Forms. This article will help you understand the differences between old and new Wix Forms.
Types of form fields
Pick form fields to collect the right information for your business needs. Form fields are grouped by contact fields, basic fields, and other elements.
To view form field types:
Go to Forms & Submissions in your site's dashboard.
Click the Old Forms tab.
Scroll down to Your standalone forms.
Create a new form or click Edit next to the form you want to edit.
Click + Add Field at the bottom of the form.
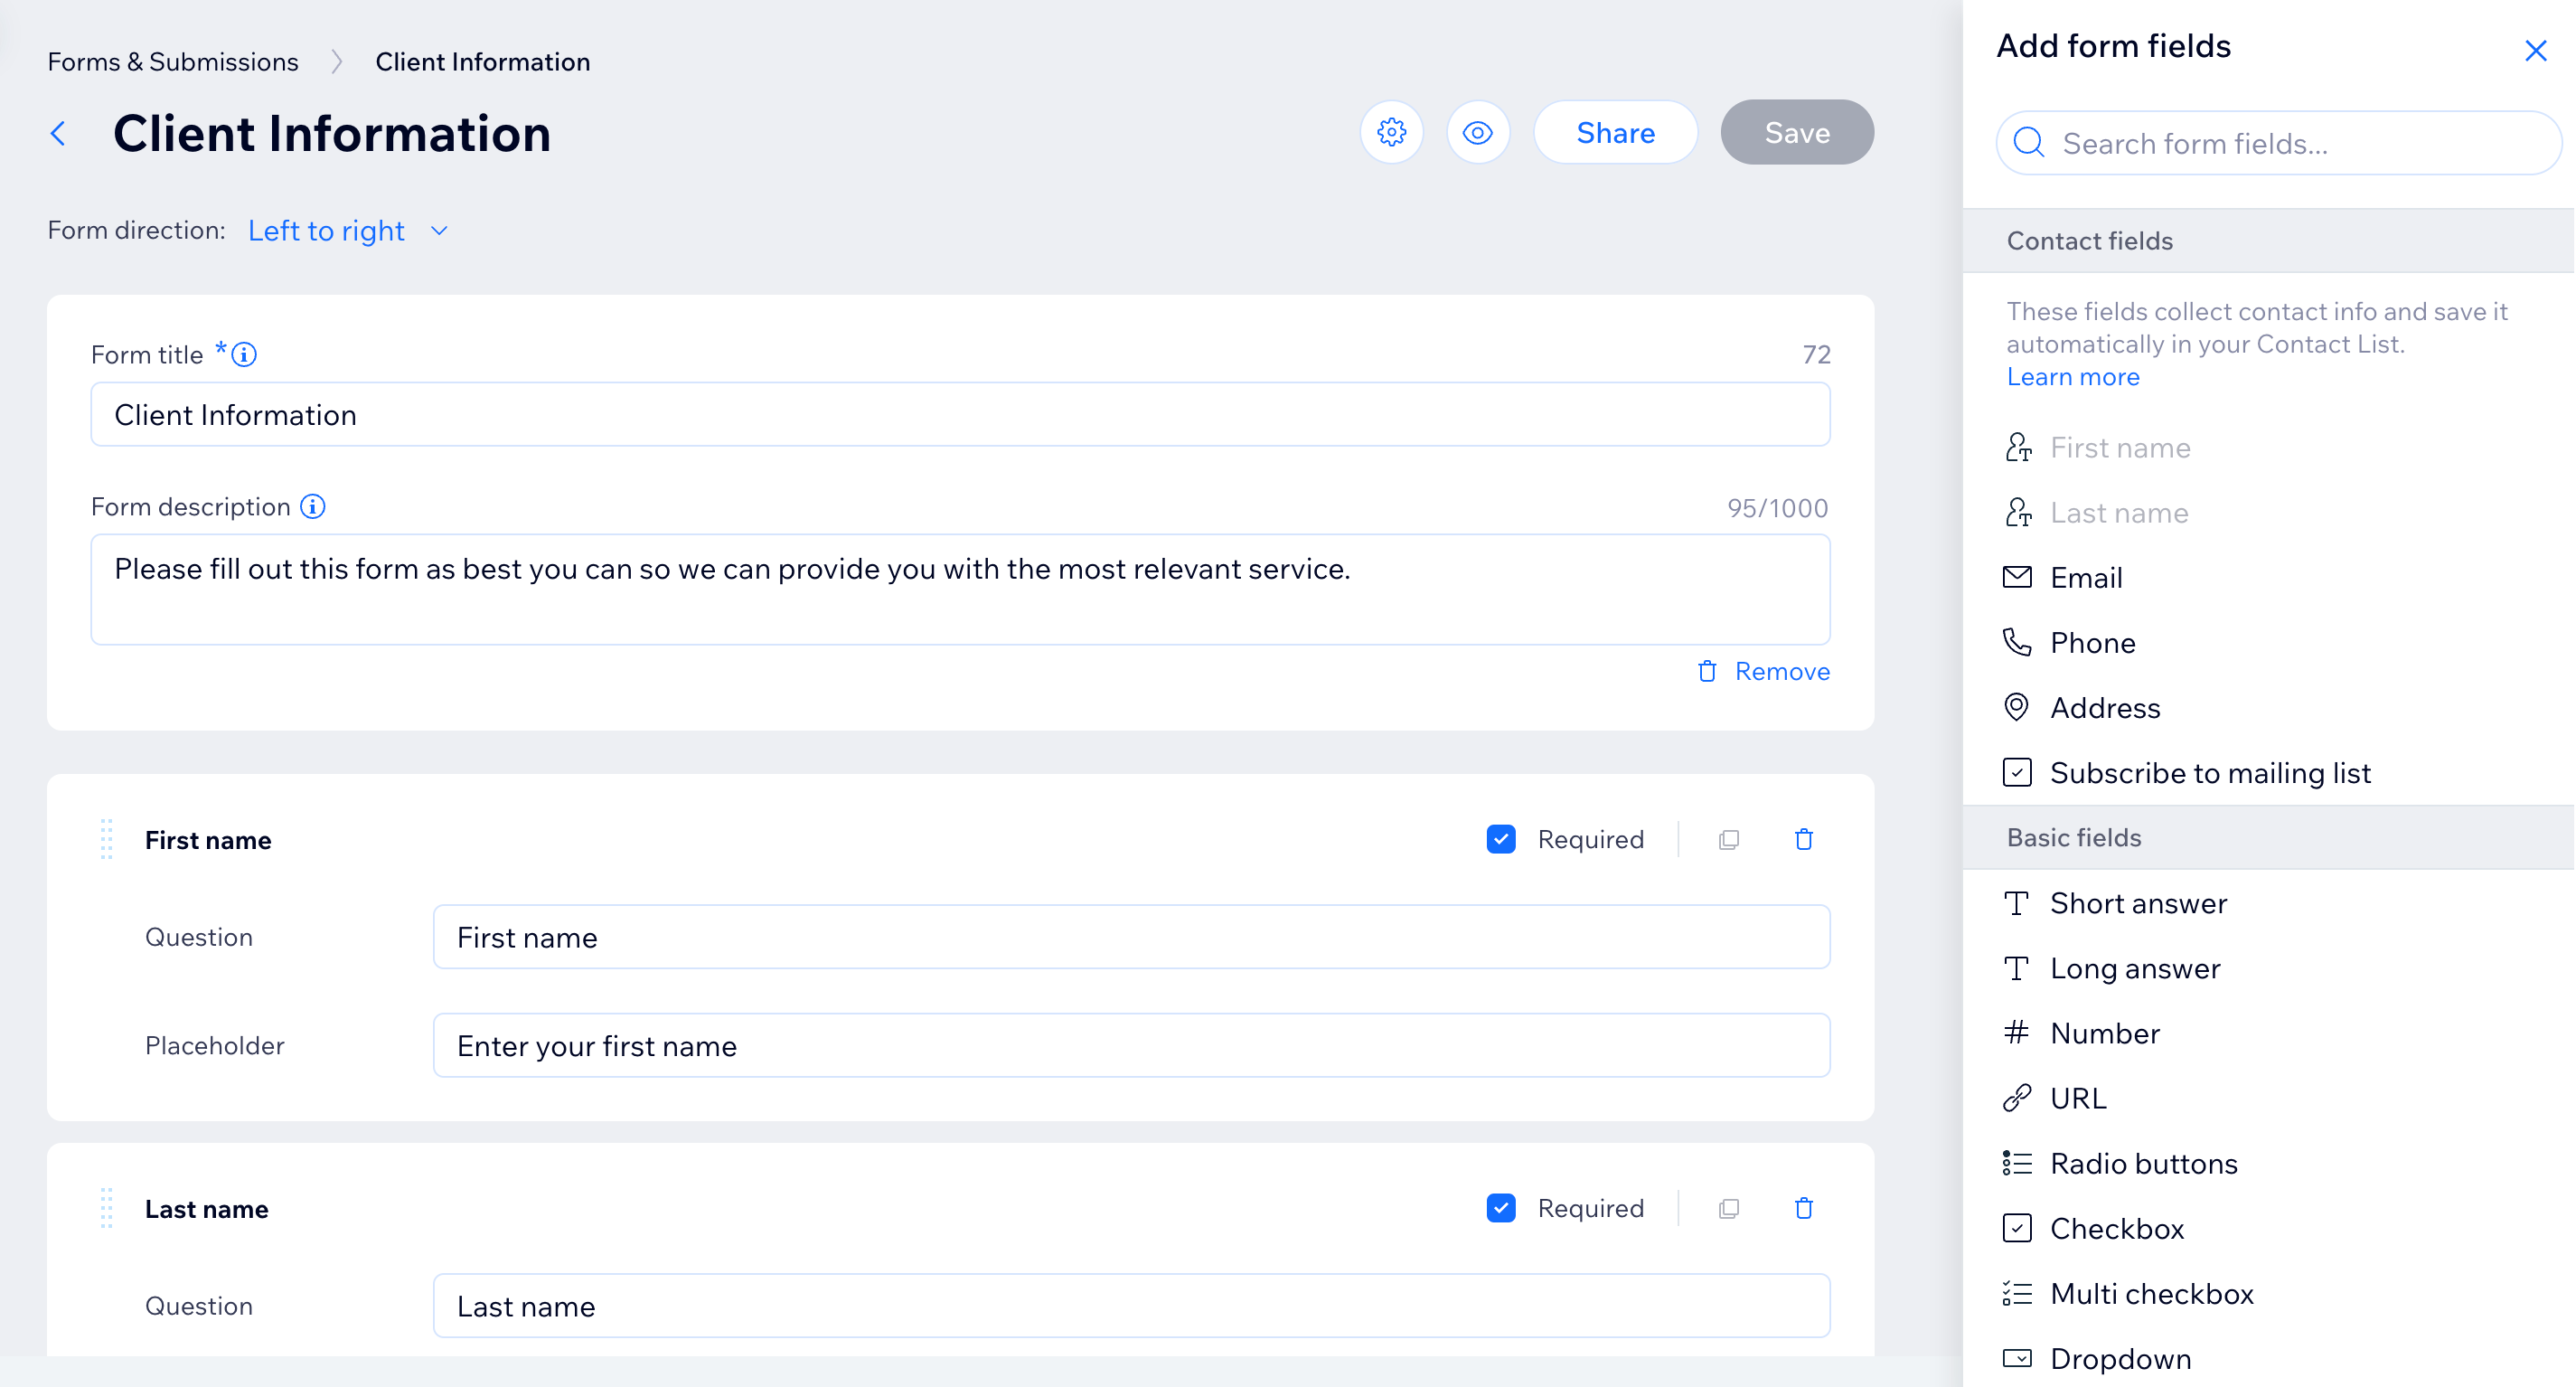
From the Add form fields panel, choose among the following options:
Contact fields
Add contact fields to your standalone forms to collect contact info from site visitors. Contact fields are useful because the data collected is automatically saved in your contact list. If a lead fills out a contact field, a new contact card is created with the information in your dashboard.
The contact fields you can add to your form include:
First name
Last name
Email
Phone
Address
Subscribe to mailing list
Basic fields
Basic fields include all the common types of fields you can add in Wix Forms such as text fields, number fields, date fields, and selection fields like checkboxes and dropdown lists.
You can use these fields for whatever info you want to collect. For example, a date field can be used to ask about date of birth, date of sign up, event date, and more.
Basic fields include:
Text (short or long answer)
Number
URL
Selection (radio buttons, checkbox, multi checkbox, dropdown)
Date
Signature
Upload file
Other elements
You can add a text element to help explain a field in your form. Include your terms and conditions, for example, or additional legal info for health waiver forms. Your audience can only read this field and not interact with it.
Other elements include:
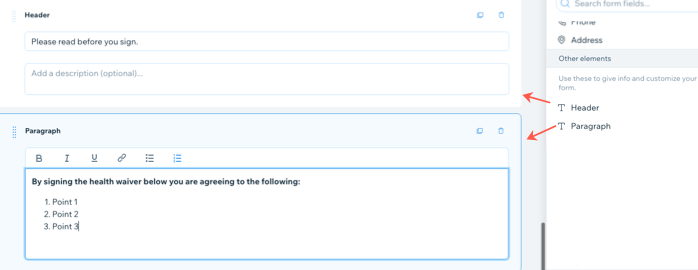
Header: Breaks up the sections of your form
Paragraph: Allows you to style the text with a rich content editor (e.g. bold, hyperlink, make a bulleted list)
Customizing unique form fields
While some fields only require filling in text for the question and placeholder, certain fields require more customization or important information to consider so that people interact with the form the way you want.
Tip:
To test the fields in your standalone form, click the View Live Form icon  at the top of the page.
To customize a form field:
Go to Forms & Submissions in your site's dashboard.
Click the Old Forms tab.
Scroll down to Your standalone forms.
Click Edit next to the form you want to manage.
Select the relevant field and customize it:
Subscribe to mailing list field
You can turn any of your standalone forms into an opportunity to build your mailing list.
Customize the subscribe field using the available options:
Checkbox text: Edit the text that appears next to the 'subscribe to mailing list' checkbox.
Opt-in method:Single opt-in: Subscribe upon submit: Once a visitor selects the subscription checkbox, they are immediately marked as subscribed in your contact list.
Double opt-in: Send confirmation email: Visitors are marked as subscribed only after confirming their subscription in an additional email they get.
Note: Visitors are still added to your contact list once they submit the form, but their subscriber status says Subscription Pending until they've verified their email.
Tip: Double opt-in verification helps to ensure that your emails reach the right contacts and that you have explicit consent from your subscribers.

Signature field
A signature field allows visitors to electronically sign their names before they submit a form. Signature fields are useful for health waivers, registration forms and application forms.
Customize the signature field using the available options:
Question: Add the title for the signature field that asks visitors to sign. It should be a call-to-action such as "Sign Here".
Clear button: Enter the text for the button that allows visitors to redo their signature.
Important legal information:
Legal recognition of electronic signatures may have different and additional requirements according to internal laws/regulations of the country. Make sure you verify which requirements apply to you in accordance with local laws.

Upload file field
Collect files from visitors by adding a file upload field to your form. Ask visitors to upload their resume for a job application form, images for a consultation form, video explanations and more.
Customize the upload file field using the available options:
Question: Edit the text that asks visitors to upload a file (e.g. "Please upload an up-to-date resume).
Button text: Edit the text that appears on the button that visitors click to upload files.
Placeholder: Edit the text beneath the button. This text can describe the type of file required, size limitations, etc.
Supported files: Click the drop-down to choose what type of file you want visitors to upload. Learn more about supported file types and sizes.

Note: When visitors upload files to your forms, they are saved in Site Files in the Media Manager.
Important:
The upload file field and signature field are premium features. Learn more about upgrading Wix Forms.
Managing your standalone form fields
Manage the fields of your standalone form at any time to keep it up to date. You can add more fields, rearrange them or delete those you don't need.
To manage your standalone form fields:
Go to Forms & Submissions in your site's dashboard.
Click the Old Forms tab.
Scroll down to Your standalone forms.
Click Edit next to the form you want to manage.
Choose what you want to do:
Add a new field
Click + Add Field at the bottom of the form.
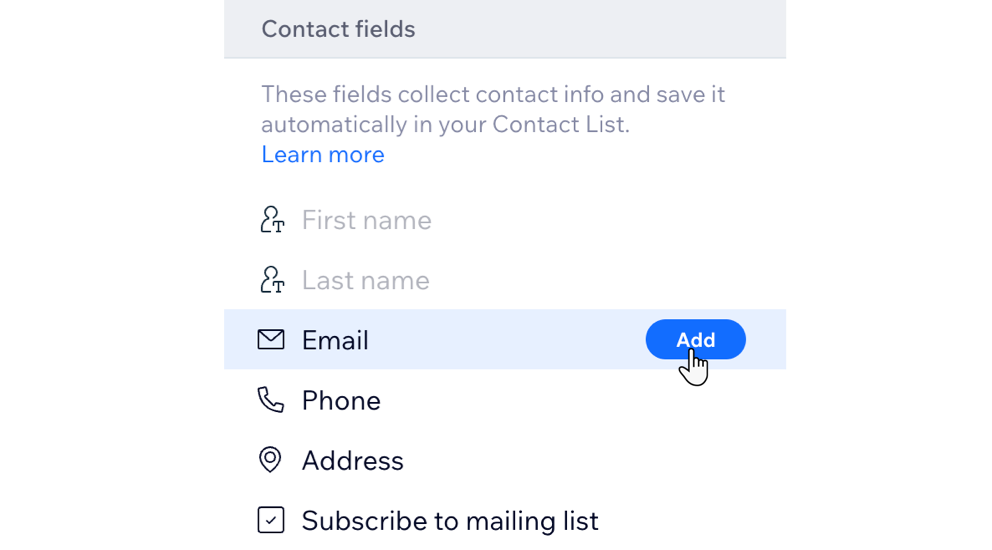
In the Add form fields panel, hover over a field and click Add.

Edit a field
Click the text box inside the field (usually next to Question or Placeholder) to edit the form's text.
Note: For some fields, there are additional settings you can adjust. For example, in a Number field you can decide to have the format in whole numbers or decimal numbers.
Add description text above or below a field
Hover over Header or Paragraph in the Add form fields panel.
Click Add.
Hold and drag the Reorder icon
 where you want the additional description.Header: Add a title for the field. You can also add a description if needed.
Paragraph: This is a great element for longer text. You can create bulleted and numbered lists, link to an external URL and more.

Reorder a field
Hold and drag the Reorder icon  where you want the field placed in the form.
Make a field required
Click the Required checkbox next to a field to make it mandatory for visitors to fill out.

Duplicate a field
Click the Duplicate icon  to the right of a field to duplicate it.
Delete a field
Click the Delete icon  to the right of a field to remove it from your form.
FAQs
Click a question below to learn more about standalone forms.
How do I share my standalone form?
Go to Forms & Submissions in your site's dashboard.
Click the Old Forms tab.
Click the More Actions icon
 next to the relevant form.
Click Share form.
Choose what to do next:Click Copy Link to copy the link to your clipboard. You cannot edit this unique URL.
Click a social media icon to share the form directly to Facebook, LinkedIn, or X (Formerly Twitter).
Click Open Live Form to view the live form in a separate tab. You can also copy the share URL from here.
Click Done.
Is it possible to add conditions (rules) to my form fields?
Standalone forms do not support conditional logic. However, you can manually adjust the form fields to guide users through the form. Alternatively, you can create a new form and add rules to the form.
Where can I see form submissions for a standalone form?
Go to Forms & Submissions in your site's dashboard.
Click the Old Forms tab.
Click View Submissions Table next to the relevant form.