Wix Mobile POS
Wix Mobile POS: Customizing Receipts
Important:
This article is about Wix Mobile POS for mobile phones.
For info on Wix Retail POS for brick and mortar stores, click here.
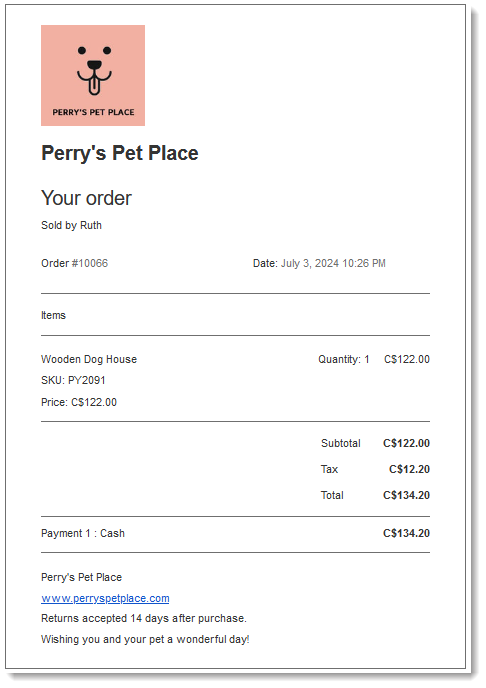
Whether you're printing receipts or emailing them to your customers, you can customize them so they reflect your brand and business. You can add your logo, enable a field to show who made the sale, add a short note at the end of the receipt, and more.

Note:
The ability to customize receipts is currently available only for sales made through Wix Stores, Wix Bookings, and Wix Restaurants Orders (New).
To customize your receipt
Go to your site in the Wix app.
Tap Manage
 at the bottom.
Tap Point of Sale under Get Paid.
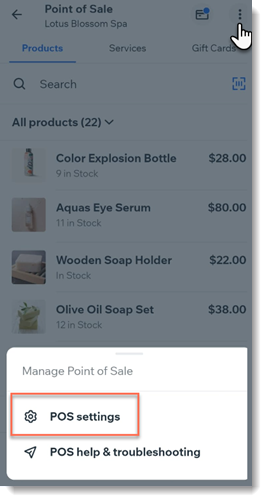
Tap the More Actions icon
 at the top right.
Select POS settings.
Note: If you don't see the POS settings option, see the note below.Tap Customize receipt.
Add any of the following to your receipt:
Logo
Upload a high-quality, black and white image.
To add your logo:
Tap the Plus icon
 .
.Select an image.
Tap Next.
Business name and website address
Enter your store's name under Business Name.
Add your site's URL under Website.
Address
Tap the Address toggle:Enabled: Enter your business address.
Disabled: No address appears on the receipt.
Employee name
Tap the Employee name toggle:Enabled: The receipt displays the name of the team member logged into the POS (e.g. Sold by Julie Kennedy). (Optional) You can edit the "Sold by" text.
Disabled: No employee name appears on the receipt.

Return policy
A clear return policy on your receipt helps prevent disputes with your customers.
Tap the Return Policy toggle:Enabled: Enter the policy.
Disabled: No policy appears on the receipt.
Custom text
Add custom text that appears at the bottom of your receipt. You can use this space to add a friendly message or invite customers to come back.
Tap the Custom Text toggle:Enabled: Enter a message (e.g. Thank you for your purchase).
Disabled: No message appears on the receipt.

8. Tap Save at the top right.
Adding POS settings:
Normally, you should be able to access the POS Settings by clicking the More Actions icon  at the top right.
