
Managing Bookings in Retail POS
Wix Retail POS: Booking Services and Accepting Payment
Important:
This article is about Wix Retail POS tablet for brick & mortar stores.
For info on using POS on a mobile device, click here.
Go to the Checkout screen to book appointments for walk-in clients and accept payment for the session.
Step 1 | Book sessions
You can book one or more sessions and add them to the cart. You can also add store products or a custom charge and accept payment for them all at the same time.
Important:
To check if a service provider is available, go to your booking calendar on desktop or in the Wix app.
To add bookings to the cart:
Open the POS tablet.
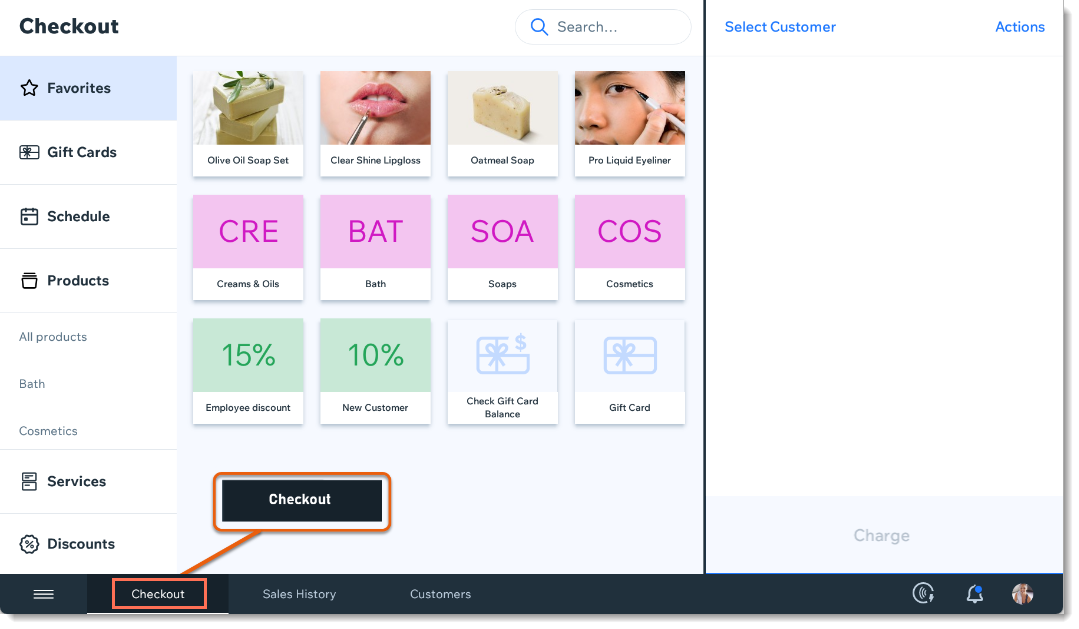
Tap Checkout on the bottom bar.
Tap Services.
Tap the relevant service.
Select the service date, time, and staff:Tap the service.
Tap the relevant staff member.
Select a date and time from the calendar.
Click Update.
(Optional) Add additional services, store products, or a custom charge.
Step 2 | Assign a customer to the sale
Make sure to add your customer's details to the sale. When they return, you can quickly assign the saved customer to a new sale.
To assign a customer to the sale:
Tap Select Customer.
Select an option:Create a new customer: Tap +New Customer, enter the details, and tap Save.
Select a saved customer: Search for the customer's name, email, or phone number or scroll down and select the customer.
Tip: You can tap View next to a customer to view their details.
Step 3 | (Optional) Apply a discount or coupon
You can offer reduced prices by adding a discount at checkout or by letting your customer redeem a coupon.
Discounts: Create a discount on the spot or add a saved discount.
Coupons: Enter a coupon code or select a coupon from your list. Learn more about coupons.
Notes:
Swipe left to remove coupons or discounts added to the cart.
You cannot apply a coupon and a discount to the same sale.
You cannot apply a coupon to a sale with a custom charge.
You can redeem coupons created with the Wix loyalty program or the Smile.io app.
To apply a discount to the cart:
Tap Discounts.
Select a discount option:Add a saved discount: Tap to select the relevant discount.
Add a saved variable discount: Tap to select, enter the amount and tap Add.
Create a discount just for this sale:Tap One-Time Discount.
Select the Amount or percentage
  icon.
icon.
Enter the price or percentage.
(Optional) Add a discount description.
Note: This does not appear on your customer's receipt.
Tap Add.
To apply a coupon to the cart:
Tap Actions.
Select Redeem a Coupon.
Select a coupon or type the coupon code.
Tap Add to Cart.
Note:
You cannot redeem Free Shipping coupons, expired coupons, or archived coupons.
To learn more about troubleshooting coupons, click here.
Step 4 | (Optional) Take additional actions
Before you accept payment for the order, you can tap the Actions button at the top right and select any of the following:
Save Cart: Save the cart so you can return to it later.
Attribute Sale to Team Member: By default, the sale (and tips added to the sale) go to the cashier. You can, however, attribute the sale to a different team member.
Step 5 | Accept payment and complete checkout
Accept cash payments or credit cards using your card reader. You can even accept payment from 2 or more payment methods (e.g. 2 credit cards).
Notes:
Card readers accept all major credit cards and payments made through the following payment apps: Apple Pay, Android Pay, Samsung Pay, VISA Paywave, MasterCard PayPass, AMEX ExpressPay and Discover D-PAS.
Canadian merchants: Interac processing fees are $0.15 CAD.
You can hide payment options you don't use.
To accept payment:
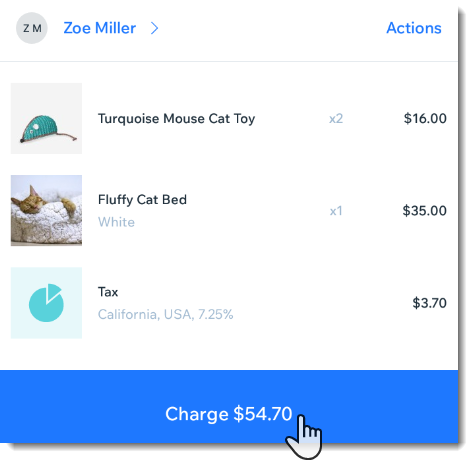
Tap Charge at the bottom right.
Choose the relevant payment method:
Accept credit card payment
Tap Card.
Use the card reader to swipe, dip (insert) or tap the card.
Note: Swiping is not available for all card readers.(Optional) Do one or more of the following:Tap Email Receipt, enter the email address if prompted, and tap Send.
Tap Print Receipt.
Tap Add a Note: Enter an internal note (not visible to your customer) and tap Save.
Tap Done.
Note: To read notes and view receipts, go to your Sales History.
Accept cash payment
Tap Cash.
Select the amount received from your customer.
Note: If you can't find the right amount, tap Other to enter a custom amount.(If applicable) Give your customer their change listed under Change Due.
(Optional) Do one or more of the following:Tap Print Receipt.
Tap Email Receipt, enter the email address if prompted, and tap Send.
Tap Text Receipt, enter the number, including country code, and tap Text Receipt.
Tap Add a Note: Enter an internal note (not visible to your customer) and tap Save.
Tap Done.
Notes:
To read notes and view receipts, go to your Sales History.
Learn how to enable text receipts.
Accept payment by gift card
Before you can accept payment by gift card, you need to create gift cards and enable the payment by gift card feature.
To accept payment by gift card:
Tap Gift Card.
Enter or scan the gift card code and tap Apply.
If there is still money owed to complete the purchase, click Add Payment and process the balance using another payment method, such as cash or a credit card.
(Optional) Do one or more of the following:Tap Print Receipt.
Tap Email Receipt, enter the email address if prompted, and tap Send.
Tap Text Receipt, enter the number, including country code, and tap Text Receipt.
Tap Add a Note: Enter an internal note (not visible to your customer) and tap Save.
Tap Done.
Notes:
To read notes and view receipts, go to your Sales History.
Learn how to enable text receipts.
Manually enter credit card details
Important: Entering credit card details manually is the least secure way of accepting card payments. We recommend accepting manual payment only from buyers you trust. Note that in case of fraud, it is the merchant who is liable. Learn more
To manually enter credit card details:
Tap Manual Card Entry.
Enter all the credit card details and tap Charge.
(Optional) Do one or more of the following:Tap Print Receipt.
Tap Email Receipt, enter the email address if prompted, and tap Send.
Tap Text Receipt, enter the number, including country code, and tap Text Receipt.
Tap Add a Note: Enter an internal note (not visible to your customer) and tap Save.
Tap Done.
Notes:
To minimize the fraud risk, as soon as the value of your transactions add up to over 30% of your gross payment volume (GPV), they start to be declined. If you want to make changes to this limitation, contact Wix Customer Care.
To read notes and view receipts, go to your Sales History.
Learn how to enable text receipts.
Accept split payment (more that one payment method)
Using split payments, customers can pay using more than one payment method (e.g. using 2 credit cards or both cash and credit card).
To process split payments:
Tap Split Total at the top right.
Enter the first payment amount.
Tap Continue.
Select a payment method (e.g. cash) and complete the first part of the payment.
Tap Continue.
(Optional) Edit the second payment amount.
Tip: To balance left to pay is calculated for you. You can edit the amount if the customer wants to split the payment into more than 2 payments.
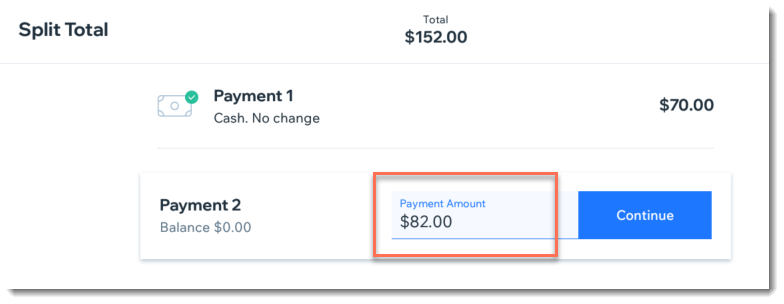
Click Continue.
Select a payment method (e.g. card) and complete the 2nd part of the payment.
Tap Continue.
(Optional) Do one or more of the following:Tap Print Receipt.
Tap Email Receipt, enter the email address if prompted, and tap Send.
Tap Text Receipt, enter the number, including country code, and tap Text Receipt.
Tap Add a Note: Enter an internal note (not visible to your customer) and tap Save.
Tap Done.
Notes:
To read notes and view receipts, go to your Sales History.
Learn how to enable text receipts.
Accepting partial payment (deposit)
You can accept a partial payment now and charge your customer the rest in one or more payments made at a later date.
To accept the first partial payment for an order:
Tap Split Total at the top right.
Enter the first payment amount.
Tap Continue.
Select a payment method (e.g. cash) and complete the first part of the payment.
Tap Continue.
Tap Mark as Partially Paid.
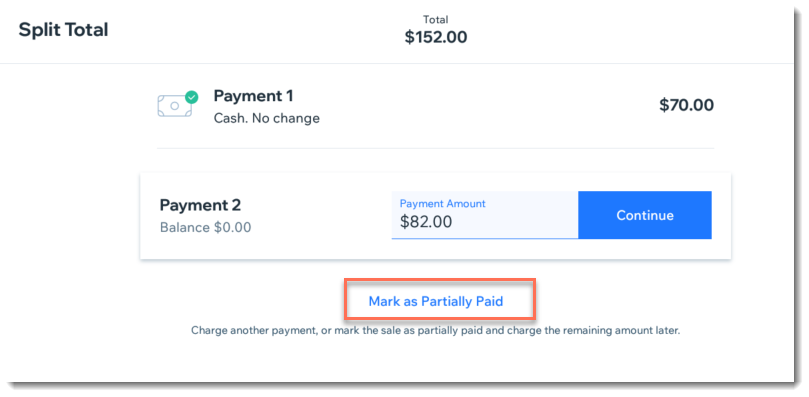
Tap Mark as Partially Paid to confirm.
(Optional) Do one or more of the following:Tap Print Receipt.
Tap Email Receipt, enter the email address if prompted, and tap Send.
Tap Text Receipt, enter the number, including country code, and tap Text Receipt.
Tap Add a Note: Enter an internal note (not visible to your customer) and tap Save.
Tap Done.
To collect additional payment(s):
Tap Sales History from the bottom bar.
Select the relevant sale.
Tap Collect.
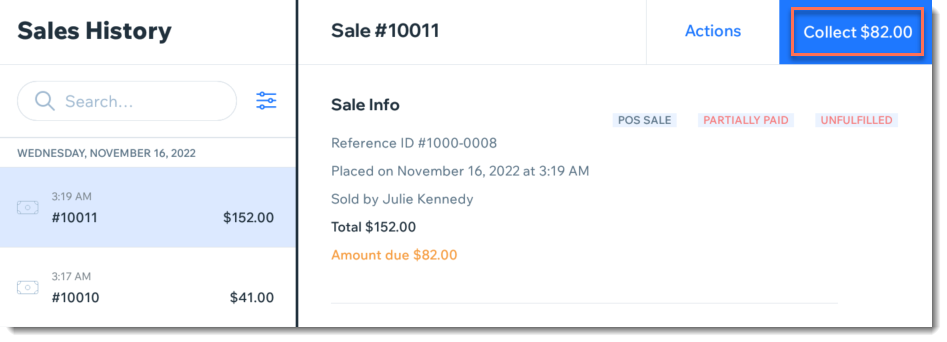
Select a payment type:Collect the balance owed: Process payment as you would for any other sale. The balance amount appears automatically.
Collect another partial payment: Tap Split Total and collect another partial payment.
Accepting other types of payment
The other payment option lets you accept payment through a payment method which is not integrated with your POS system (e.g. though an app or physical gift card).
Important: Since you receive direct payment from your client, you do not receive this amount as a Wix POS payout.
To process other payment types:
Tap Other.
Enter a short note documenting how the customer paid you (e.g. Venmo payment).
Note: The note appears in customer's receipts and in the Sales History tab in the tablet.Tap Record Payment.
(Optional) Do one or more of the following:Tap Print Receipt.
Tap Email Receipt, enter the email address if prompted, and tap Send.
Tap Text Receipt, enter the number, including country code, and tap Text Receipt.
Tap Add a Note: Enter an internal note (not visible to your customer) and tap Save.
Tap Done.
Notes:
To read notes and view receipts, go to your Sales History.
Learn how to enable text receipts.
Redeem payment from a plan
Tap to select the session.
Tap Redeem Session.
Select the relevant plan.
Tap Redeem.
After payment is completed, the service is added to your calendar. The service provider is set as the default staff member and the date is the current date. The time is added in the past since sessions are often paid for upon completion. This means that it you process the payment at 4:00 PM, it'll appear in the calendar as a 3:00 PM appointment. You can edit these details in the calendar.
FAQs
We are here to answer all your questions. Click a question below to learn more:
Tip:
All the sales you make at your point of sale are fully synced with your online store's inventory.
Can I add tax to a completed POS sale?
No, it's not possible to add tax after you've completed POS transaction.
Can I allow customers to leave a tip?
Yes, you can enable tipping in the Payments tab. Learn how to enable and set up tipping.
How can I save a cart?
If you don't want to complete your sale right away or want to be able to duplicate your cart at a later date, you can save it. To help you find it later, give your cart a name and add a description.
To save a cart:
Tap Actions at the top right corner of the cart.
Tap Save Cart.
(Optional) Enter a name for your cart and any additional info.
Tap Save.
When you want to retrieve the cart later, tap Actions and Retrieve Cart. Then, select the relevant cart and tap Open Cart to make changes or complete the sale.