Setting up Retail POS hardware
Wix Retail POS: Connecting a Network Card Reader
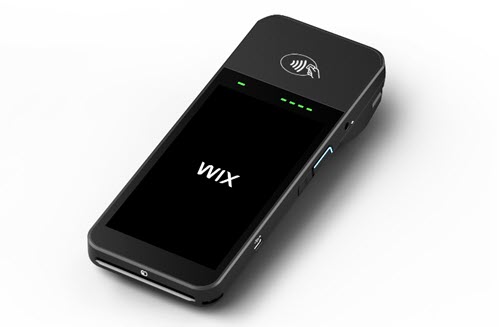
Before you can collect payment from customers by credit card, debit card, or phone app, you need to connect a card reader to your POS tablet. This article will walk you through how to connect a network card reader, which is a reader that connects to your POS tablet via a WiFi connection.
Tips:
Currently, the only available network reader is the BBPOS WisePOS E card reader.
Alternatively, you can connect a Bluetooth card reader, such as the Stripe M2 card reader (US) or the WisePad 3 Card Reader (Canada).
The WisePOS E card reader supports all magstripe and EMV payment functions and you can use it to accept new forms of payment, such as Apple Pay, Android Pay, Samsung Pay, VISA Paywave, MasterCard PayPass, AMEX ExpressPay and Discover D-PAS.
Step 1 | Get the card reader
You can purchase the BBPOS WisePOS E card reader anywhere they are sold or from the Wix POS shop.

Step 2 | Unbox and charge your card reader
Once you have the card reader, unbox it and charge it so it'll be ready to set up.
To prepare your reader:
Unbox your card reader.
Insert the battery.
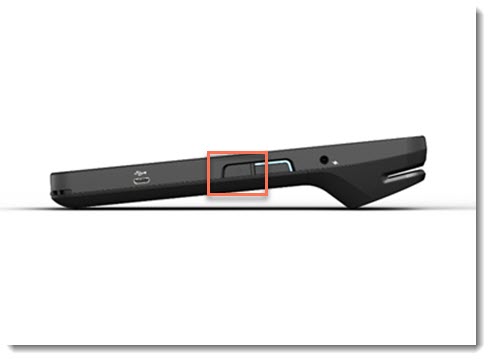
Press the power button to turn the reader on.

If required, charge your reader.
Tip: Plug the reader into a wall outlet, not directly into the tablet.
Step 3 | Connect the reader to WiFi
Now you can connect your card reader to the same WiFi network you're using for your POS tablet.
To check which network your tablet is connected to, click the Menu icon  on the tablet, select App & Tablet and click Wi-Fi & Network.
Important:
If the reader and tablet are connect to different WiFi networks, you won't be able to use the reader.
I see WiFi networks displayed on the reader's screen
Tap to connect to the same WiFi network that your tablet is connected to.
I don't see WiFi networks displayed on the reader's screen
Swipe right on your card reader screen.
Tap the Settings button.
Enter 07139 as the PIN code.
Select Network.
Connect to the same WiFi network that your tablet is connected to.
Step 4 | Pair the card reader to your POS tablet
After connecting to WiFi, a three-word code should automatically appear on the card reader screen. If not, you can generate the code. Once you have it, you'll enter it in your POS tablet.
I see a code displayed on the reader's screen
Open the POS tablet.
Tap the Menu icon
 at the bottom left.
Tap Manage Hardware.
Select Set up Card Reader.
Tap Connect next to Network reader.
Tap +Pair a New Network Reader.
Enter the three-word code you see on the reader.

(Optional) Give your card reader a name.
Note: If you plan on using more than one reader, this will help you manage them.Click Pair Reader.
I don't see a code displayed on the reader's screen
Generate a code:Swipe right on your card reader screen.
Tap the Settings button.
Select Generate pairing code.
Enter the three-word code in the pop-up, including the hyphens.
Open the POS tablet.
Tap the Menu icon
 at the bottom left.
Tap Manage Hardware.
Select Set up Card Reader.
Tap Connect next to Network reader.
Tap +Pair a New Network Reader.
Enter the three-word code you see on the reader.

(Optional) Give your card reader a name.
Note: If you plan on using more than one reader, this will help you manage them.Click Pair Reader.
Tip:
After your reader is paired, you'll see it in your list of available card readers in the Manage Hardware tab in the tablet.
Troubleshooting network printer connections
If you are experiencing any issues setting up card reader, click a question below.
Why can't I pair the card reader to my tablet?
Any of the following will prevent you from pairing with your computer dashboard:
Card reader is turned off: Turn on the card reader.
Card reader battery has no charge: Charge the card reader.
The reader is connected to another WiFi network: To connect, both your tablet and your reader need to be connected to the same WiFi network. Check which network each of them is connected to and make any necessary changes.
My reader is paired, but not connected. Why?
Pairing the reader means that your tablet recognizes it and adds it to your list of available card readers in the Manage Hardware tab in the tablet.

When a reader is paired, it automatically connects.
The reader can, however, become disconnected for a number of reasons. For example, if your card reader is very low on charge, has no charge at all, or is turned off, it will be offline. Once the card reader is turned on and has enough charge, it will reconnect on its own.
What happens to my reader when the charge is low?
If the charge is too low, the reader will shut down. You may not get a clear indication before this occurs.
Note: After plugging in the reader to charge, it won't be ready for immediate use. You may initially be able to turn it on but not access the start screen with the Wix logo.
What can I do if the card reader is frozen?
Hold down the power button for 6 seconds to restart.
I have paired more than one reader. How can I switch between them?
If you have paired more than one reader, you'll see them listed under available readers.

Tip: The Bluetooth readers and WiFi readers are listed separately.
To switch to a different card reader:
Open the POS tablet.
Tap the Menu icon
 at the bottom left.
Tap Manage Hardware.
Tap Manage Card Reader.
Select the reader you want to disconnect.
Tap Disconnect in the top right corner.
Tap Disconnect to confirm.
Tap Connect next to the reader you want to connect.
How can I remove a reader from my list of readers?
When you remove (unpair) a reader, it no longer appears in your list of network readers.
Tip: If you plan on using this reader in the future, we recommend that you disconnect it instead of removing it. You can disconnect a reader by simply turning it off.
To remove a reader:
Tap the Menu icon
 at the bottom left.
Tap Manage Hardware.
Select Network reader.
Swipe left next to the reader you want to remove.
Tap Remove.
Tap Remove to confirm.